


Tracking changes is an imperative feature of version control systems. However, understanding exactly what changes you’re tracking and how you’re tracking them in Git can be a bit difficult. It’s important to thoroughly get to know your file statuses, how they change, and when they change so you can make the most of Git in your projects.
Git offers the git status command for this purpose. It helps developers track their uncommitted changes and understand how their project files are being tracked. In this post, we’ll explore this status command in depth and learn how it can be used effectively to understand your file statuses.
An Overview of Git Status
Here’s what the git status command looks like:
$ git status
You can run it inside a project that has initialized a Git repository. So let’s also create a new project where we can explore this status command:
$ mkdir git-status && git initInitialized empty Git repository in .../git-status/.git/
It’s a Bridge
In essence, the git status command forms the bridge between the add and the commit commands. The former adds your changes or files to the staging area, whereas the latter commits those changes in the commit history.
We know that Git works with three different trees: the working directory, staging area, and commit history. If you’re unfamiliar with these concepts, you can learn more about them here. The status command primarily works on the first two trees: the working directory and the staging area.
What Does the Status Command Actually Tell Us?
The git status command tells you three important things:
- What changes you’ve made in your working directory
- Changes that are present in your staging area
- Which of your files are actually being tracked by Git
Furthermore, at any given point in time, it tells you the state of your files or changes. This gives you more specific information on the status of your files or changes. When you run the status command, your project files at any point in time can be in one of three states: untracked, no-history, or modified.
Let’s see what each state means, and walk through some examples.

The Untracked State
Let’s begin by creating three empty text files inside our project.
$ echo > file1.txt > file2.txt > file3.txt
If you head inside the project, you should have three text files highlighted in green as shown:
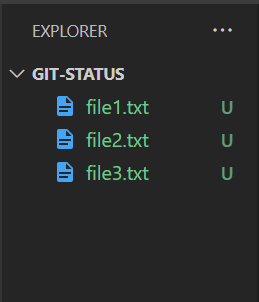
The letter on the right side of the filename represents the name of the state each file is in. In this case, we have an uppercase U for each file.
Now, let’s run the status command:
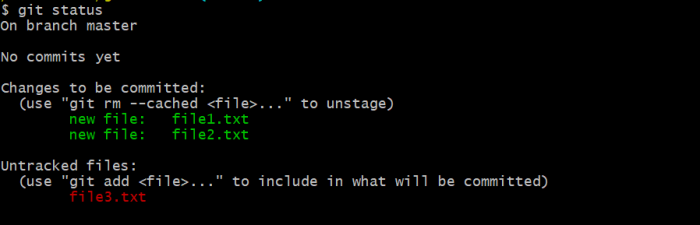
$ git statusOn branch masterNo commits yetUntracked files: (use "git add <file>..." to include in what will be committed) file1.txt file2.txt file3.txtnothing added to commit but untracked files present (use "git add" to track)
Notice that Git states all your files are untracked. This untracked state basically represents files or changes that Git isn’t tracking yet. All your project files are in this state when you first initialize a Git repository. Thus, the U we talked about before stands for untracked.
You can remove your files from the untracked state by running the add command. At this step, Git knows it needs to track these new files.
Let’s say we wish to track file1 and file2. Run the add command on these two files:
$ git add file1.txt file2.txt
Now, if we run the git status command:
$ git statusOn branch masterNo commits yetChanges to be committed: (use "git rm --cached <file>..." to unstage) new file: file1.txt new file: file2.txtUntracked files: (use "git add <file>..." to include in what will be committed) file3.txt
Git tells us that both file1 and file2 are being tracked and only file3 is left untracked. By running the status command you can check your untracked files and move them to the staging area so Git can track changes in those files.
But why did we leave file3 behind? Let’s explore this now.
The No-History State
Sometimes your project contains files that you don’t want Git to track. This could be compiled binaries of your project, external dependencies, .env or environment files containing confidential credentials, and so on. You can keep these files in the no-history state by adding their entries in a special .gitignore file so that Git never tracks them.
Let’s assume that file3 in the above example contains some confidential credentials, and we don’t want Git to track it. Currently it’s in the untracked state, but it makes sense to keep it there.
Open this project in an editor and create a .gitignore file. Add file3.txt inside the .gitignore file as shown:
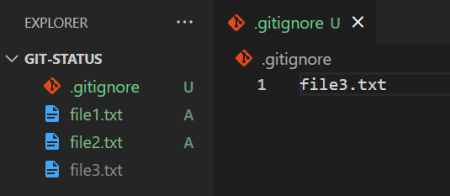
All files are highlighted in green except file3, which is highlighted in gray. All files you add to the .gitignore file are highlighted in gray.
Notice that the .gitignore file has a U after it, implying that this file itself is in the untracked state. Let’s verify this by running the git status command:
$ git statusOn branch masterNo commits yetChanges to be committed: (use "git rm --cached <file>..." to unstage) new file: file1.txt new file: file2.txtUntracked files: (use "git add <file>..." to include in what will be committed) .gitignore
We can confirm that file3 has been removed from the untracked state and the .gitignore file is in the untracked state. So let’s run the add command now since we want Git to track it:
$ git add . && git statusOn branch masterNo commits yetChanges to be committed: (use "git rm --cached <file>..." to unstage) new file: .gitignore new file: file1.txt new file: file2.txt
Great! Now you have nothing in the untracked state, and you have moved a confidential file of your project to the no-history state.
The Modified State
The purpose of untracked files is to track them at some later point in time. Earlier, we moved our file1 and file2 out of the untracked state with the add command. But what happened to these files and where are they now?
Let’s say now we want to modify the contents of both these files.
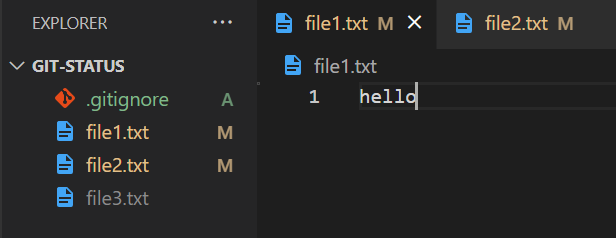
Notice that both file1 and file2 are highlighted in orange and are followed by an M as opposed to an A. This M represents "modified." Therefore, these files are now in the modified state.
Let’s run the git status command now:
$ git statusOn branch masterNo commits yetChanges to be committed: (use "git rm --cached <file>..." to unstage) new file: .gitignore new file: file1.txt new file: file2.txtChanges not staged for commit: (use "git add <file>..." to update what will be committed) (use "git restore <file>..." to discard changes in working directory) modified: file1.txt modified: file2.txt
The modified state basically tells you what changes are ready to be committed. We have modified file1 and file2 and have moved them to the modified state.
Once you move your files to the modified state, you can then commit these changes locally or to a remote repository.
Passing Options to the Status Command
Up until now, we have only used the status command directly. However, you can also pass options or flags to it. For instance, you can display all the ignored files or files present in the no-history state using the --ignored flag.
$ git status --ignoredOn branch masterNo commits yetChanges to be committed: (use "git rm --cached <file>..." to unstage) new file: .gitignore new file: file1.txt new file: file2.txtChanges not staged for commit: (use "git add <file>..." to update what will be committed) (use "git restore <file>..." to discard changes in working directory) modified: file1.txt modified: file2.txtIgnored files: (use "git add -f <file>..." to include in what will be committed) file3.txt
Remember we added file3 in the no-history state? We can see it under the "Ignored files" heading in the output of the git status command as shown above.
You can display the output of the git status command in short format using the -s flag. This way you can see all the information in a more condensed form:
$ git status -sA .gitignoreAM file1.txtAM file2.txt
The letter next to each of these files reveals their current state in your project. All files in the staging area have an A before them. Since we moved file1 and file2 to the modified state, they also have an M before them.
Here’s an exhaustive list of options you can pass to the git status command.
Git Log vs. Git Status
We saw that git status displays the status of the working directory and staging area. The git status command is often compared and sometimes confused with another similar command called the git log command.
As the name suggests, git log displays a log of information, but this information pertains only to your commit history. Thus it simply displays a list of commits you’ve made to your project.
Let’s make a few commits to our project now.
$ git add . && git commit -m "modified file1 and file2"[master (root-commit) d54f32e] modified file1 and file2 3 files changed, 3 insertions(+) create mode 100644 .gitignore create mode 100644 file1.txt create mode 100644 file2.txt
Git tells us the branch we are on, a small hash for the commit we have generated, and the commit message we passed. However, if you check out a commit instead of a branch, you may end up in a detached HEAD state—understanding what this means can help you avoid confusion when navigating commit history. Let’s check the commit history by running the git log command now:
$ git logcommit d54f32e2dc7d36a71c33e965368f292e7895c262 (HEAD -> master)Author: fuzzysidDate: Tue Oct 19 09:01:08 2021 +0530 modified file1 and file2
You can further understand git log as git status equivalent but only for your committed changes. Here’s an exhaustive list of common options you can pass in addition to the git log command.
Git Diff vs. Git Status
The git diff command is often used in combination with git status to analyze your file changes. Just like the git log command, it’s a common ground for misunderstanding and confusion for developers.
The git diff command gives more detailed information about the status of your files. “Diff” itself stands for difference, and git diff gives you the exact changes in your files.
Let’s go back to our previous examples and change the contents of file1. Currently, file1 contains a simple “hello” inside it.
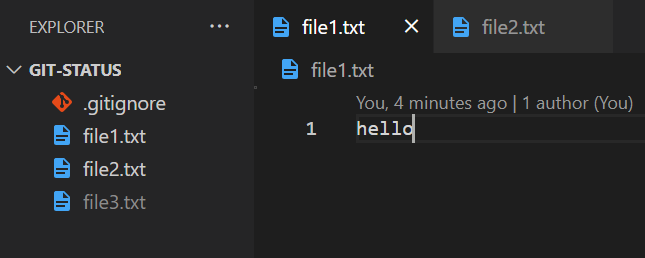
Let’s change “hello” to something else:
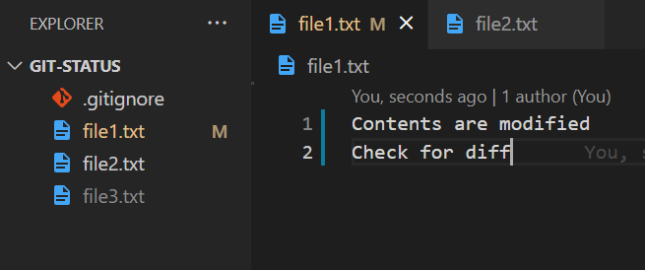
Notice that file1 has now moved to the modified state. Let’s now run the git diff command:
$ git diffdiff --git a/file1.txt b/file1.txtindex b6fc4c6..6411ab1 100644--- a/file1.txt+++ b/file1.txt@@ -1 +1,2 @@-hello\ No newline at end of file+Contents are modified+Check for diff\ No newline at end of file
Thus, the git diff command tells you the exact changes made in the files along with some other meta information. In the above output, we see some insertions and deletions have occurred in file1. We also see what has been deleted and what has been added line by line.
While git status only tells you the state of your file changes, git diff tells you the exact changes. You can use git diff to compare your changes before staging or committing them. You can also use this command with the --color-words flag to highlight changes in a visual manner:
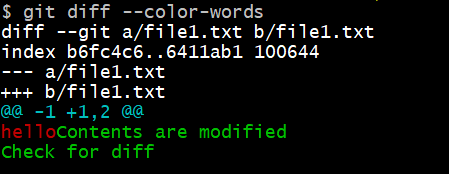
There you go! Your deletions are now marked in red and insertions in green.
Conclusion
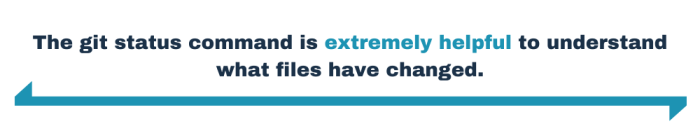
The git status command is extremely helpful to understand what files have changed. The three states tell you how you can gain control over what you want to track and what you want to commit.
Once you’ve used the git status command, you should always use the git diff command as a best practice before committing your changes. This will help you ensure that you’re not accidentally committing changes you didn’t want to commit in the first place.
Finally, use the git log command to view all your commits before pushing them to a remote repository. This will ensure that you use Git neatly and allow your teammates to avoid any confusion with respect to changes you’ve made in the project.
Check out More Git Resources
- Git Push: Learn how to push your changes to a remote repository.
- Git Pull: Discover how to pull the latest changes from the remote.
- Git Reset: Understand how to reset your working directory to previous commits.
- Git Merge: Learn the ins and outs of merging branches in Git.
- Git Undo Commit: Learn how to undo commits in Git.
This post was written by Siddhant Varma. Siddhant is a full-stack JavaScript developer with expertise in front-end engineering. He’s worked with scaling multiple startups in India and has experience building products in the educational technology and healthcare industries.


