

The humble but powerful Dockerfile is the building block of Docker images and containers. In essence, it's a list of commands the Docker engine runs to assemble the image, and thus instances of images as containers.
Let's look at an example before learning to construct our own.
This is the Dockerfile for RethinkDB, a popular open-source, real-time database.
LANG:bash
dockerfile FROM debian:jessie
MAINTAINER Daniel Alan Miller dalanmiller@rethinkdb.com
RUN apt-key adv --keyserver pgp.mit.edu --recv-keys 1614552E5765227AEC39EFCFA7E00EF33A8F2399 RUN echo "deb http://download.rethinkdb.com/apt jessie main" > /etc/apt/sources.list.d/rethinkdb.list
ENV RETHINKDBPACKAGEVERSION 2.0.4~0jessie
RUN apt-get update
apt-get install -y rethinkdb=$RETHINKDBPACKAGEVERSION
rm -rf /var/lib/apt/lists/*
VOLUME ["/data"]
WORKDIR /data
CMD ["rethinkdb", "--bind", "all"]
EXPOSE 28015 29015 8080
The first FROM command is an important Docker command, allowing you to pull dependencies from other images; in this case, the Jessie version of Debian. The next command sets the maintainer of the image, for reference and information.
The RUN command is something you will use frequently. These define commands to run from within the container when it's first created. These can be any command line instruction you wish if you have the dependency to support it. For example, if you're using an image that contains a Ruby run-time, these could be Ruby commands.
ENVsets an environment variable available within the container, useful for setting variables that software needs to run.VOLUMEdefines a path in the container that Docker exposes to the host system and mapped using the-vargument when running a container.WORKDIRchanges the active directory of the container to a specified location, in case you need to run commands from or in a particular location.
While RUN issues commands used to prepare the container for use, CMD runs the software that the container is designed to run (in the format CMD ["executable", "parameter1", "parameter2"]), and is best used for commands that result in an interactive shell, such as Python.
Reflecting Docker's microservice structure, there should ideally only ever be one CMD, and if there is more than one, only the last will matter.
If your container needs something more complex, then use the ENTRYPOINT command. The CMD and ENTRYPOINT instructions can be used to specify the default commands that run when a container starts. When used in conjunction with CMD for parameters, ENTRYPOINT sets the main command for the image, allowing you to run an image as if it were that command.
For example, the following runs the swarm command, passing --help as a parameter:
LANG:code
dockerfile ENTRYPOINT ["/swarm"] CMD ["--help"]
Another common use of the ENTRYPOINT command is to run a bash script in the image, allowing for more complex operations.
EXPOSE exposes the ports that the software uses, ready for you to map to the host when running a container with the -p argument.

Create a Dockerfile from Scratch
For this example, I am going to create an image (and thus container) for testing the website and build process for a site built in Jekyll. I'm choosing Jekyll because all my sites use it, it's a simple system to understand, and well, I love it.
There is an official image, but it doesn't use the latest version of Jekyll, is (in my opinion) over complicated, and anyway, I want to show you how to write your own.
Create a new folder, and then a Dockerfile inside it.
Start by setting the base image, which in this case will be the official Ruby image, and set a maintainer.
LANG:html
dockerfile FROM ruby:latest MAINTAINER Name <info@example.com>
Now create a user and group for Jekyll, set appropriate permissions and install the Jekyll gem:
LANG:bash
dockerfile RUN
mkdir -p /home/jekyll
groupadd -rg 1000 jekyll
useradd -rg jekyll -u 1000 -d /home/jekyll jekyll
chown jekyll:jekyll /home/jekyll
gem install jekyll
I'm working on the source files for the project locally, so create a mount point where the Docker container can access files on the host system.
LANG:code
dockerfile VOLUME /home/jekyll
You can also copy the files into the container, but this makes the image less flexible:
LANG:code
dockerfile COPY . /home/jekyll/
There are a folders you don't need in the container, so create a new .dockerignore file to ignore certain paths:
LANG:code
dockerfile .bundle .git _site
Next, set the directory that contains the site, and serve the site.
LANG:code
dockerfile WORKDIR /home/jekyll ENTRYPOINT ["jekyll", "serve"] EXPOSE 4000
You can now build the image with:
LANG:code
dockerfile docker build .
Create a container based on the image with any variation of the docker run command you wish. However, something like the command below will create a container based on the image that sets a name and mounts a local volume at the mount point. You can get the IMAGE_ID from the Docker images command:
LANG:bash
docker run --name cs_jk -it -d -P -v <PATH_TO_SITE>:/home/jekyll <IMAGE_ID>
So far, so good. But remember, as the Jekyll site grows, you'll add gems and other dependencies that also need to be available in the container. Let's fix that by adding these lines below the WORKDIR command:
LANG:code
dockerfile COPY Gemfile /home/jekyll COPY Gemfile.lock /home/jekyll RUN bundle install
Now when you rebuild and rerun the container, the gems added will be available.
Push Image to Docker Hub
Great! You now have a simple custom image. The next step is to get it onto the Docker Hub, where it can be more useful to you and other Docker users.
Create an account on the Docker Hub and then log in from your terminal with the same credentials:
LANG:bash
docker login
Now, tag your image:
LANG:bash
docker tag <IMAGE_ID> <USERNAME>/jekyll:devel
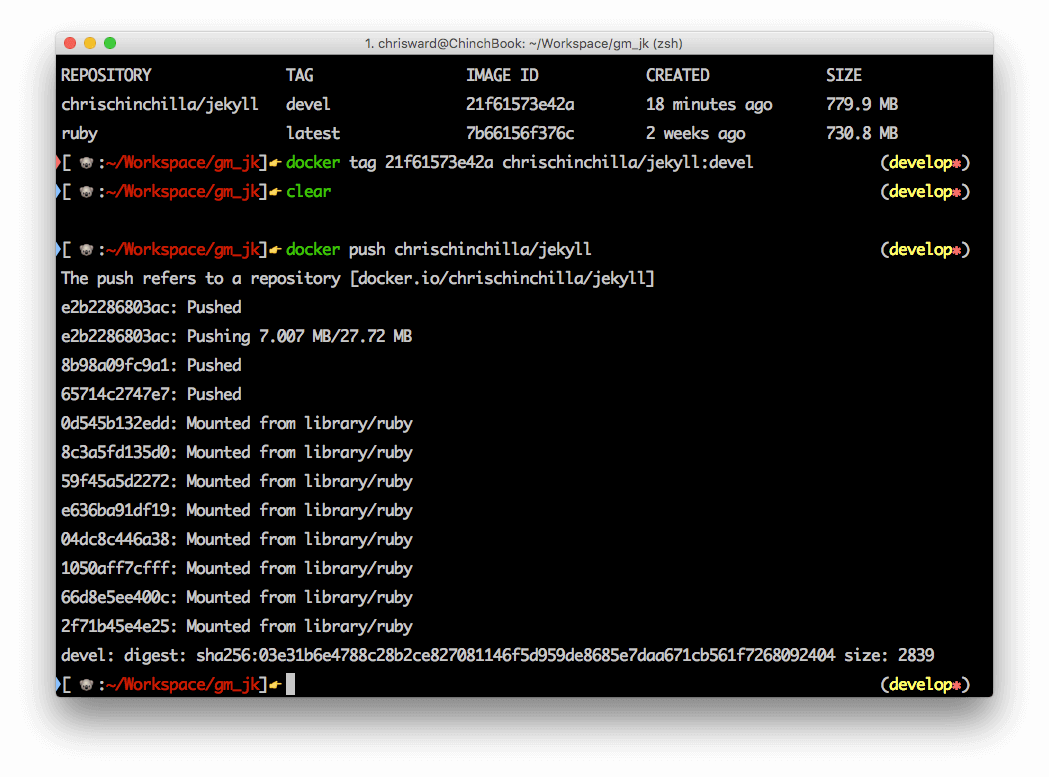
Of course, feel free to change all the values to something else. They can be anything that works for you, but there are some standard tags that users expect. Now if you run Docker images, you finally see a user-readable name in the REPOSITORY column.

And push it to the Docker Hub:
LANG:bash
docker push <USERNAME>/jekyll
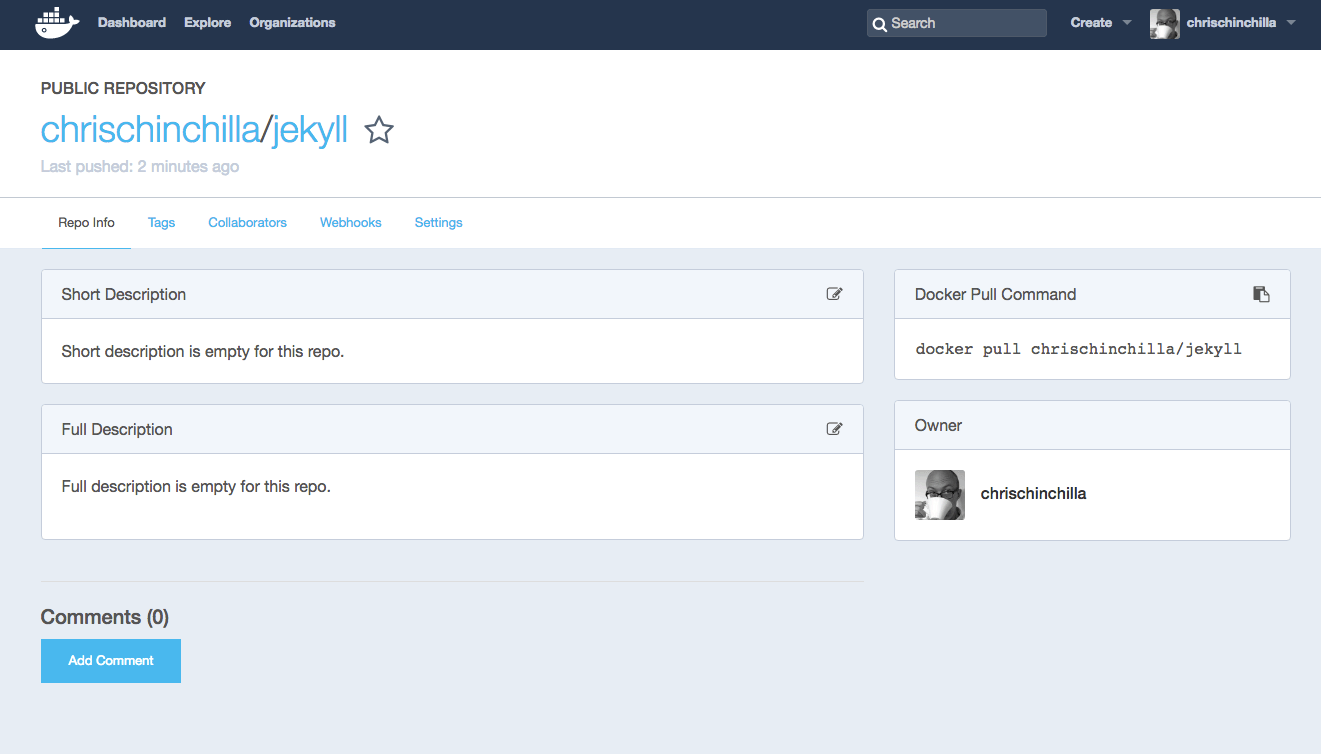
If you log in in to your Hub account, you will see the image listed and ready for others to use with a docker pull <USERNAME>/jekyll command.
Once you’ve tested your container and pushed your image to Docker Hub, it’s a good idea to clean up by stopping and removing any leftover containers that were used during the build or testing process. If containers become unresponsive, you can always kill all containers.
Next Steps and Best Practices
A Dockerfile is simple, and this is intentional. One of the core concepts of Docker is for each component to be as small and discrete as possible, with each container ideally performing one task each.
Take, for example, a Jekyll site. Perhaps you also want to lint your code and text for errors, then create another image and container. Want to generate an ePub of your text? Create another container with a Pandoc process. Need Search on your site? Hook up an Elasticsearch image and container. You can then link these together and share the same code base with Docker Compose, allowing you to create complex, interconnected containers and applications.
Dockerfiles are the building blocks of Docker, and nothing else in the toolchain works without them. While they are simple, in practice, it can be difficult to understand the best way to write them to provide maximum flexibility. If you want to read more, I recommend Docker's official guide, and I welcome any of your comments or questions.


