

You're doing it right. You've set up an array of microservices that offer REST APIs to support an enterprise application. Your architecture is comprised of loosely coupled services that have enabled your team to roll out updates quickly in response to new feature requests and bugs.
But when it comes time to make a change, you still find yourself struggling with dependencies.
While it's possible to version your APIs, you want something more granular. A new API still requires a release of both a new service and a new client application. Wouldn’t it be nice to coordinate a change between client and microservice without rolling out new code?
Feature toggles (also known as feature flags) give you that ability and more!
Feature toggles provide a way to control new behavior in an application by enabling or disabling it without deploying a different version. You can install these toggles in services and clients. For example with REST services, you can toggle new behavior for a subset of users or only enable it after deploying a new client application.
So we add a new parameter to our configuration file or the command line, default it to “off,” and flip it "on" when the new client is deployed, right? No. That's not a sustainable solution. It's a hack. Updating a configuration file isn’t necessarily easier than deploying a new configuration, nor should it be. In many systems, a configuration change is a new release. And what happens when the migration to the new feature is done? Does the feature stay in the configuration file? How big will your configuration file get after a few years? Is it possible it gets turned on by mistake someday?
There's a better way. There’s feature flag management.
Instead of using configuration variables that evolve into technical debt, you manage feature toggles from a feature flag management platform. You can integrate them into a strategy for improving your code, enhancing your ability to support your application, and making your customers happier. With a central management platform like CloudBees Feature Management, you can group flags and coordinate a new feature between client and service, based on a variety of factors like application version and client platform. We're going to add a feature toggle to a REST service written in Python. We'll start with a simple flag that's managed in configuration and then migrate it to CloudBees Feature Management as part of a secure feature flag management system. This tutorial assumes familiarity with basic Python and a little bit of Flask. You'll need to have Python 2.x installed on your system, along with PIP.
Python Virtual Environment Setup
First, you'll set up a Python virtual environment to run the microservice. If you don't have virtualenv installed yet, you can install it with PIP.
LANG:code
$ pip install virtualenv
Next, create a directory and run virtualenv inside it. Then use the virtual environment's Python to install Flask.
LANG:code
$ mkdir rollout
$ cd rollout
$ virtualenv rollout
New python executable in flask/bin/python
Installing setuptools............................done.
Installing pip...................done.
$ rollout/bin/pip install flask
Now you have a virtual environment installed with Flask. We'll be doing all of our development here. You can use any editor or IDE you wish for the following examples. I'll just show code snippets and the output of most commands. First, let's create a simple web server, so we're sure everything is in working order. So, create a file name webserver.py and add this code:
LANG:dockerfile
#!rollout/bin/python
from flask import Flask

app = Flask(name)

@app.route('/')
def index():
    return "Hello, Rollout!"

if name == 'main':
app.run(debug=True)
We created a Flask application and set up a route for the root path. When a browser requests the root document, the server will return a greeting in plain text. Next, let's make it executable, so we can run the script.
LANG:code
$ chmod +x webserver.py
Finally, it's time to run it.
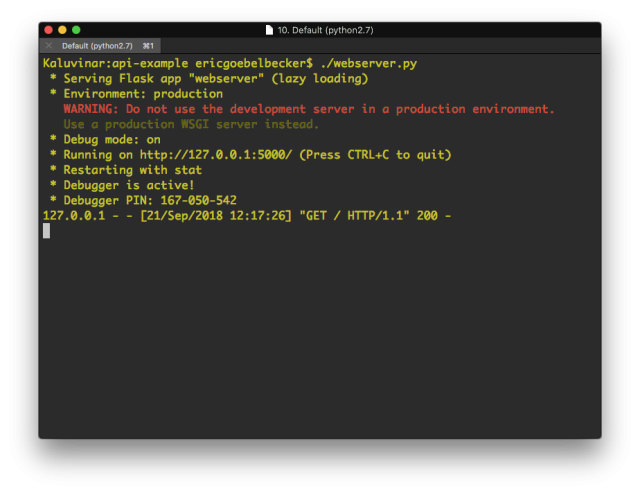
Now point your web browser at localhost and port 5000.
We have a simple web server to work with. Next, we'll add a REST endpoint and a feature flag.
A Python Feature Toggle
Now, let's turn this into a REST service and add a simple feature toggle. First, we'll define a document that represents a normal day. Our service will return this document in response to a REST request. Next, change the one and only route to return that document when it receives a GET request with no parameters. Finally, edit the URL path to look more like a REST application.
LANG:dockerfile
#!rollout/bin/python
from flask import Flask, jsonify

app = Flask(name)

normalday = {
        'id': 1,
        'title': u'Meh',
        'description': u'Just another day',
        'party': False
}

@app.route('/calendar/api/v1.0/whatistoday', methods=['GET'])
def get_tasks():
    return jsonify({'today': normalday})

if name == 'main':
    app.run(debug=True)
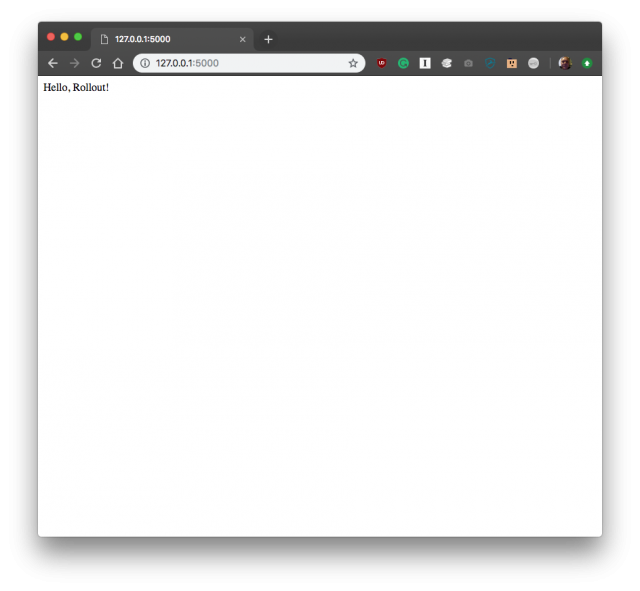
So, we've established calendar/api/v1.0/whatistoday as our endpoint. Let's hit it from the browser. Rerun app.py.
Then point your browser at the new URL so we can see what our REST response looks like.
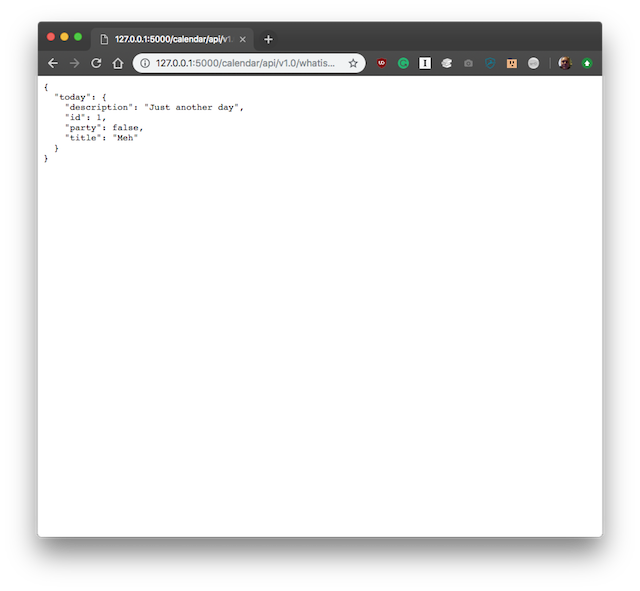
We have a basic REST service! Now, let's add a feature toggle. Not every day is just another day. We need a feature for holidays that we can flip when we want to return a different response to our GET request. First, you'll need to create a configuration file. Create a file name calendar.properties with a single section named calendar and a single property named holiday. Start with it set to true.
LANG:code
[calendar]
holiday=False
Next, add the code to read it to app.py. Add ConfigParser to the imports.
LANG:python
import ConfigParser
And use RawConfigParser to process the file.
LANG:code
config = ConfigParser.RawConfigParser()
config.read('calendar.properties')
holiday = config.getboolean("calendar", "holiday")
So, we have a boolean that indicates whether or not it is a holiday. Now let's use modify our route, so it uses the configuration property to decide what document to return.
LANG:python
normalday = {
        'id': 1,
        'title': u'Meh',
        'description': u'Just another day',
        'party': False
}

specialday = {
        'id': 2,
        'title': u'Woo-hoo!',
        'description': u'A day to remember!',
        'party': True
}

@app.route('/calendar/api/v1.0/whatistoday', methods=['GET'])
def get_tasks():
    if holiday == True:
        return jsonify({'today': specialday})
    else:
        return jsonify({'today': normalday})
We have two different days defined, and the rest service will return one of the other depending on the configuration setting. So, start app.py and refresh your browser.

Since holiday is set to True, we see the holiday JSON object. Next, stop app.py and edit the configuration file to set holiday to False. Start the service, and refresh the browser again.+
Since we flipped value for holiday to false, we see the message for a normal day again. We’ve added our first feature flag. The value of holiday in the properties file controls our application’s behavior. We can return the desired JSON object by modifying the configuration and without deploying new code. But, we still need to manage the configuration file and restart the application after we change it.
Python Feature Flag Management
A properties file is not a feature flag management system. It requires modifying a configuration file in production, which is an accident waiting to happen. If we want to avoid editing live configurations, we have to version and distribute configuration files like code so we can track changes. So let's look at a better way to manage Python feature toggles with CloudBees Feature Management.
Getting Started With CloudBees Feature Management
First, you’ll need to create a free CloudBees Feature Management account here. Once that's done, sign in to your account and create a new application.
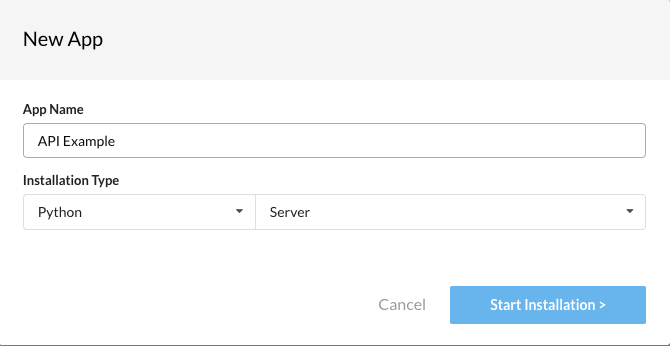
Be sure to select Python, as shown above. Next, you’ll see instructions for adding CloudBees Feature Management to your application. Leave this dialog box open while you set up your environment so that you can return to it. You'll want to use it later to finish setting up your application. Now you need to add Rox to the virtual environment you've been using. Execute rollout/pip install rox from the command line.
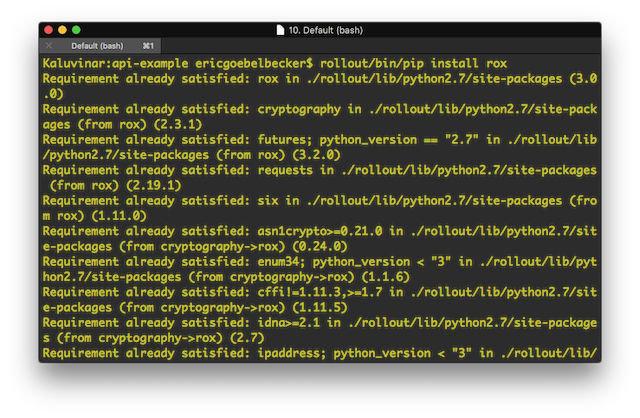
Pip will generate a lot of output.
Initialize the API
Next, we need to initialize the SDK with the application key shown above. First, add the import statement import rox.server.rox_server to the top of the file. Then add the call to Rox.setup() with your application key.
LANG:dockerfile
#!rollout/bin/python
from flask import Flask, jsonify
from rox.server.rox_server import Rox

app = Flask(name)

Rox.setup("YOUR_APPLICATION_KEY");
We're going to run this once to initialize CloudBees Feature Management, so the rest of the application can stay the same for now. Click Next on the installation dialog.
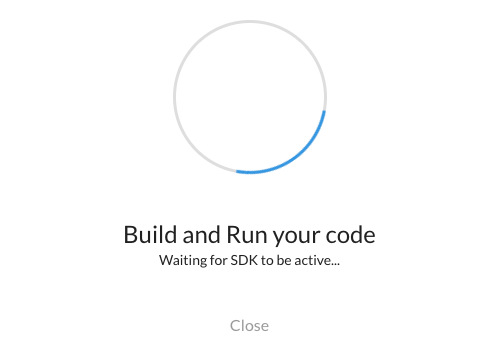
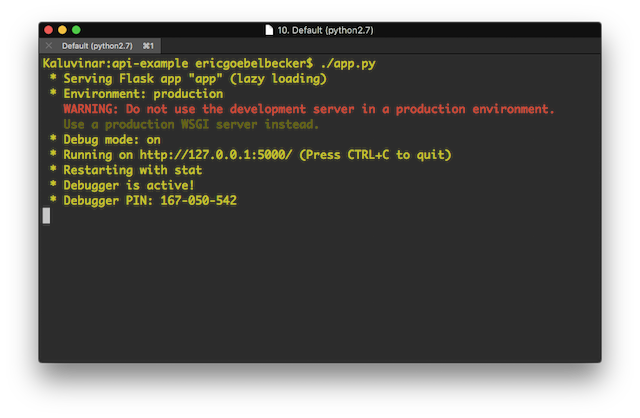
CloudBees Feature Management is waiting for the application to initialize. Run app.py.
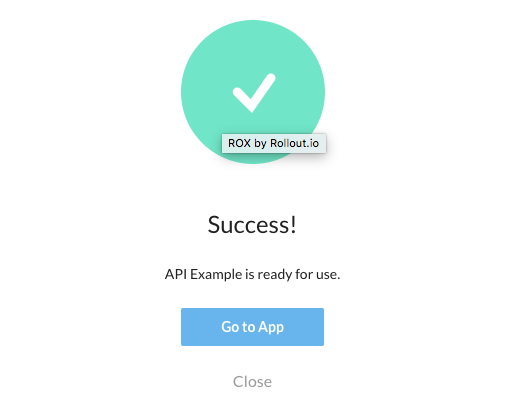
The application will bring up the web server, but we're only interested in initializing Rox. When you see the that the server is ready for requests, check and make sure you see the Success message above.
Creating a Python Feature Toggle
Click Go To App on the success dialog in the CloudBees Feature Management dashboard if you haven't already. On the left-hand side of the page, there is a Flags menu item. It's not enabled yet, because you haven't created any flags. So you need to add a feature toggle to your application. This is a two-step process. First, define the toggle in your application code. Then run the application, and the new flag is registered in the CloudBees Feature Management dashboard. We're going to add the feature toggle code in the main source file to keep things simple. In a production application, you'd break things down into different files for each class. Feature flags are kept in RoxContainers. Let's add one to the application. First, import rox_flag into the application.
LANG:dockerfile
from rox.server.flags.rox_flag import RoxFlag
Then, create a container class with a single member. Near the top of the file.
LANG:python
class MyContainer:
def __init__(self):
    self.isHoliday = RoxFlag()
This class contains a single member named isHoliday. A RoxFlag holds a feature toggle. You'll see how to use it in a moment. Create an instance of the container, and then once the container is created, register it with the Rox API. So right before the call to Rox.setup(), call register with the container. Register accepts a name with it. We'll call this one Flags.
LANG:code
roxcontainer = MyContainer()
Rox.register('Flags', roxcontainer)
Rox.setup("YOUR_APPLICATION_KEY");
Now, run the application and let it finish initializing. Just as before, stop it when it starts waiting for requests. Return to the CloudBees Feature Management dashboard, and click on the Flags menu.

The flag has been registered with CloudBees Feature Management. Since we registered the flag in a container named Flags, its name in the dashboard is Flags.isHoliday. Naming containers provides a mechanism for organizing flags (and other variables managed by Rox) in a large application.
Using a Python Feature Toggle
Now we need to wire the toggle up so we can use it to control our application's behavior. A RoxFlag has an is_enabled() method that we call to see if the feature is toggled true or false. So, let's integrate the flag into our code. Here's the entire application after adding the code to use the toggle:
LANG:dockerfile
#!rollout/bin/python
from flask import Flask, jsonify
from rox.server.rox_server import Rox
from rox.server.flags.rox_flag import RoxFlag

app = Flask(name)

normalday = {
        'id': 1,
        'title': u'Meh',
        'description': u'Just another day',
        'party': False
}

specialday = {
        'id': 2,
        'title': u'Woo-hoo!',
        'description': u'A day to remember!',
        'party': True
}

class MyContainer:
    def init(self):
        self.isHoliday = RoxFlag()

roxcontainer = MyContainer()

Rox.register('Flags', roxcontainer)

Rox.setup("YOUR_APPLICATION_KEY");

@app.route('/calendar/api/v1.0/whatistoday', methods=['GET'])
def get_tasks():
    if roxcontainer.isHoliday.is_enabled():
        return jsonify({'today': specialday})
    else:
        return jsonify({'today': normalday})

if name == 'main':
    app.run(debug=True)
Inside the application route, we replaced the boolean we loaded from the configuration file with isHoliday.is_enabled().
Creating an Experiment
We manage flags by adding them to experiments. An experiment is a scheme for controlling flags (and other variables) in production. Click on Production in the left-hand side menu and then click Experiments. This will bring up a screen with a Create Experiment button. Click that and then fill out the new experiment window with a name.
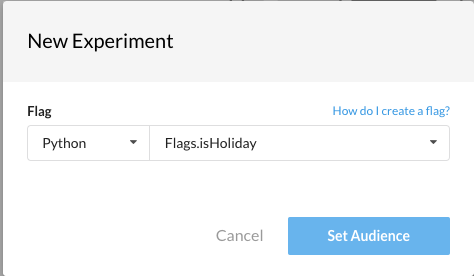
And we see a console for setting flags to true, false, or split. Several criteria can set the flag's value. For this tutorial, we're going to stick with setting the flag as true or false for all users. The flag defaults to false or disabled. Let's run the application and see it in action. Run app.py.
Next, refresh your web browser.
We see the record for a normal day. Head back to the experiment and set the flag to true for all users. Next, restart the Python script. Then refresh your browser again.
It worked! We can manage our feature toggle from the dashboard.
Refreshing the Flag
The REST service only retrieves isHoliday's value on startup. If we want to toggle the flag, we still need to restart our application. We'd rather be able to toggle the flag in real time. Let's fix that. We can refresh Rox API toggles with Rox.fetch(). We can call this anytime in our application to get the latest state of our flags. But, this is a Flask application, and Flask wants to control the main thread. We need to set refreshing the feature toggle values up as a background task. It would also be nice to know if the flags have changed each time we run fetch. So, let's make two last code updates. First, let's pass some configuration options to Rox.setup(). We configure the Rox API's behavior with the RoxOptions class. We're going to install a configuration fetched handler. This is a callback that Rox will call when the latest state of our flags is fetched.
LANG:code
options = RoxOptions(
    configuration_fetched_handler=lambda o:
        sys.stderr.write("Refreshed rollout. Found changes=%s \n" % o.has_changes)
)

Rox.setup("YOUR_APPLICATION_KEY", options);
We created an instance of the class and passed in a lambda to run when the configuration is fetched. We'll print a message stating that the fetch completed and whether or not there were any changes. If you run the application now, you'll see that is called once, on application startup.
LANG:code
Refreshed rollout. Found changes=True
Next, we need to install a function that will periodically run and fetch the flag state. Since Flask wants to control the application threads, installing a thread before it starts or trying to run in another thread before transfer control to it can cause problems. Our best option is to create a Flask job. Add this code to the application before you execute app.run.
LANG:python
@app.before_first_request
def activate_job():
    def run_job():
        while True:
            Rox.fetch()
            time.sleep(3)

thread = Thread(target=run_job)
thread.start()
This code installs a thread that will run Rox.fetch() every three seconds. This thread won't interfere with Flask's request handler. Now, start the application again, and make a few requests. Then head back to the CloudBees Feature Management dashboard, change the flag, and make more requests. You'll see that the service returns a different result depending on how you set Flags.isHoliday.
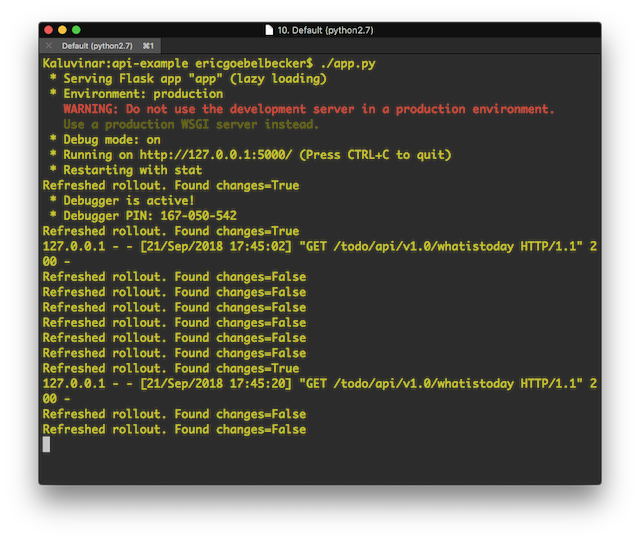
The REST service is picking up the requests and changing its behavior. You can toggle your feature flag in real-time.
Start Managing your Feature Flags Today
First, we built a small REST service using Python and Flask. Then we added a basic feature flag and then upgraded the application to a managed feature toggle with CloudBees Feature Management. We finished by integrating reading toggles with Flask's main event loop.
This is only the tip of the iceberg! CloudBees Feature Management can manage configuration flags that hold more than an enabled or disabled state. Experiments can distribute flag values over different users based on values such as application version and device. Sign up for a CloudBees Feature Management trial today and take control of your feature flags and application strategy.


