

If we had to elect the most important command in Git, I’d vote for git commit. After all, committing your work is the whole reason behind using a versioning tool. So, understanding what a commit really is and how to use the command is crucial for mastering Git.
In this post, we’ll offer a detailed guide to git commit, explaining many of its use cases and specialized options, and even when you should commit.
Throughout the post, we’ll assume you have Git installed on your system. If that’s not the case, start by downloading and installing it. We’ll also assume at least some familiarity with the command line. Let’s get started.

Git Commit Fundamentals
Let’s make sure we’re on the same page regarding some fundamental topics related to the git commit command.
What Is a Commit in Git?
In Git, “commit” is both a verb and a noun. After you make some changes to your project, you commit those changes. As a result, you get a commit. So, what’s a commit—the noun type—in Git?

A commit represents a “safe point” in a project’s history. Each commit has an identifier so you can get back to it. Also, each commit—except the first one, called root commit—references one or more parents. The revision history of the repository emerges from this relationship.

What Are Commit Messages?
Each git commit must have an associated commit message. The goal of the message is to explain the reason behind the change.
Git commit messages can be just a single line, or they can have a summary followed by a more detailed body, depending on the change. It’s also common to include metadata in the commit message—for instance, include ids to associate the commit to a certain issue on your project management or bug-tracking software.
What’s a Good Git Commit Message?
A good commit message explains what the change is and why it matters. Explaining how the change was made in detail isn’t necessary, since we can see the difference.
There are conventions for writing good commit messages, and covering them in-depth would be out of the scope for this post. Here are a few, though:
- The message should be in the imperative mode (so, “Add button” instead of “Added button”).
- In messages that need a separate body, they should be separated by a blank line.
- The subject line should be limited to 50 characters.
Git Commit vs. Subversion Commit vs. TFVC Check-In
How does committing in Git compare with similar operations in systems like Subversion or Team Foundation Version Control (TFVC)?
Git is a decentralized version control system, unlike Subversion or TFVC. In those systems, committing involves talking to the server.
In Git, committing is a local operation. To send changes to a remote repository, you can use git push. However, if you want to retrieve changes from a remote repository, use git pull.

How Do I Commit a File in Git?
Time to roll up your sleeves and learn how to commit changes in Git.
Committing a New File
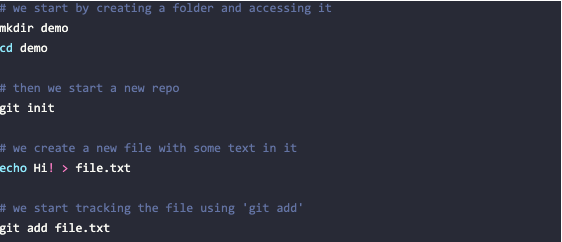
In Git, new files aren’t versioned by default. So, to commit a new file, you first have to track it. Then you can use the git commit command to commit the change. Let’s see an example:
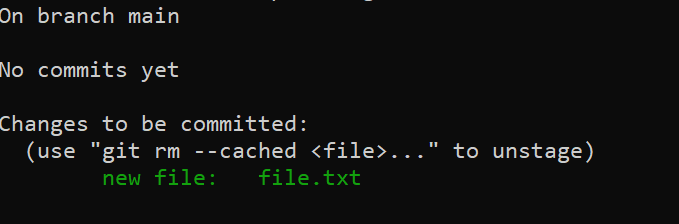
You’re now ready to commit your new file. If you run git status, you’ll see the following:
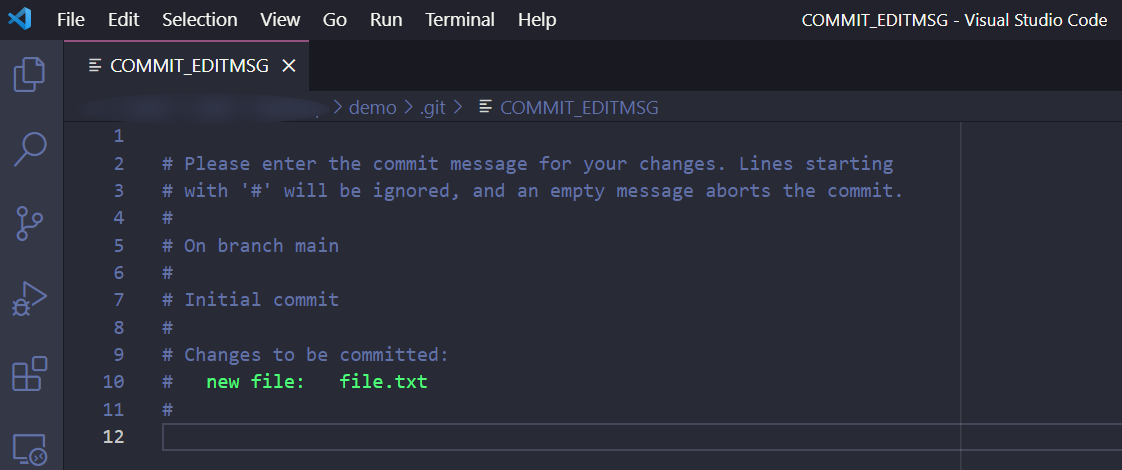
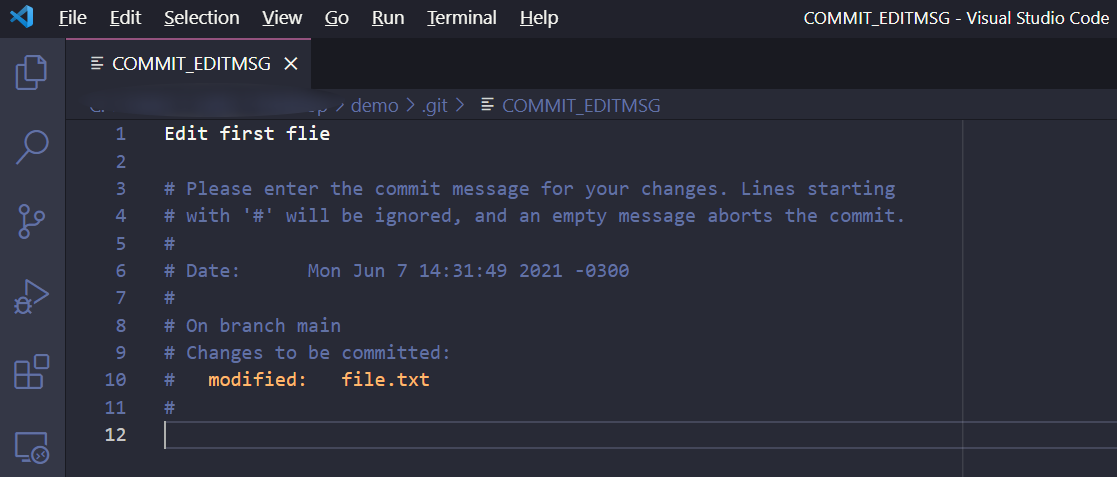
To commit, you use git commit. Then Git will open the default text editor—which you configure during installation—so you can write the commit message. After you save and exit your editor, Git finishes the commit.
In my case, Visual Studio Code is configured as the default text editor, so that’s what I see:
Now you just have to replace that placeholder text with the actual commit message, save, and close your editor. After you do that, Git will complete the commit:

You can do it in a single step when your commit message is brief. Just use the -m option and then supply the message in one go:

Committing Changes to Existing Files
When working with Git, you’re more likely to commit changes to existing files than to create new ones.
To do that, you use git add—it’s a multipurpose command—to stage the changes you want to commit—that is, to include them in the next commit. Let’s see how we can do that.
First, run the following commands to create and commit a second file:

Great. Your repository now has two files. Let’s now change the first file:

Do the same to the other file:

Now your two files are edited, and you can verify that by using the git status command. Next you’re going to commit only the changes made to the first file:

If you run git status now, you’ll see the other file is still marked as changed. Repeat the same procedure to commit it:

Committing Multiple Changes in One Go
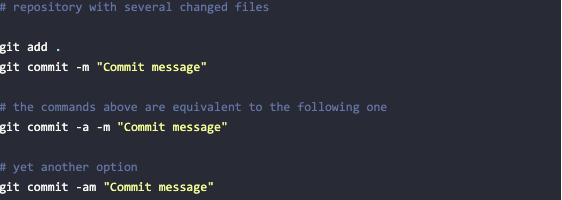
Let’s say your repository contains multiple changes and you want to commit all of them, which is a very common scenario. Will you need to add the changes file by file? Luckily, no. You can simply use git add to include all the current changes into the next commit.
Alternatively, you can skip the git add step altogether. When committing, simply use the -a option—for all—to commit all of the changes.
At any time, you can use the git log command to see your commit history.
I Made a Mistake: What Now?
Under the hood, commits can’t change. But what should you do if you make a mistake? Well, there are commands that appear to “change” commits. Actually, they create new commits and “abandon” the old ones. For simplicity’s sake, I’ll use phrases such as “change” or “delete” commits, but keep in mind this is a simplification.
Note: In some cases, undoing changes incorrectly can leave you in a detached HEAD state—understanding how this happens and how to recover can save you from losing important work.
We’ll now see some of these commands, so you can learn how to undo commits in Git. A warning, though, before we move on: Some of these commands perform what we call “destructive operations.” In other words, they rewrite history.
Rewriting history might be OK if you’re working alone or that history hasn’t left your machine yet. However, rewriting public history—that is, changing commits other people depend on—is something you should avoid at all costs.
Amending a Commit to Change Its Message
Let’s say you made a typo when writing a commit message:

That’s easy to fix: You can amend the commit. Before you make any other change to the repository, simply run git commit --amend. Your default text editor will open and you’ll be able to fix the commit message:
Fix the message, save and close your editor, and Git will finish the operation. Now, if you use git log, you’ll see the commit has the correct message. You might also realize the commit now has a different identifier. That’s because it is in fact a new commit object.
Amending a Commit to Include More Changes
Sometimes, you forget to include some changes in a commit. You can also use git commit --amend for that.
Let’s say you change the first file and commit it:

Then you realize you should’ve changed the other file as well, and both changes should be included in the same commit—for instance, both changes might be required to fix a bug.
Now you must first change the second file and add it to the stage as you’d normally do:

Then, you simply run git commit --amend again:
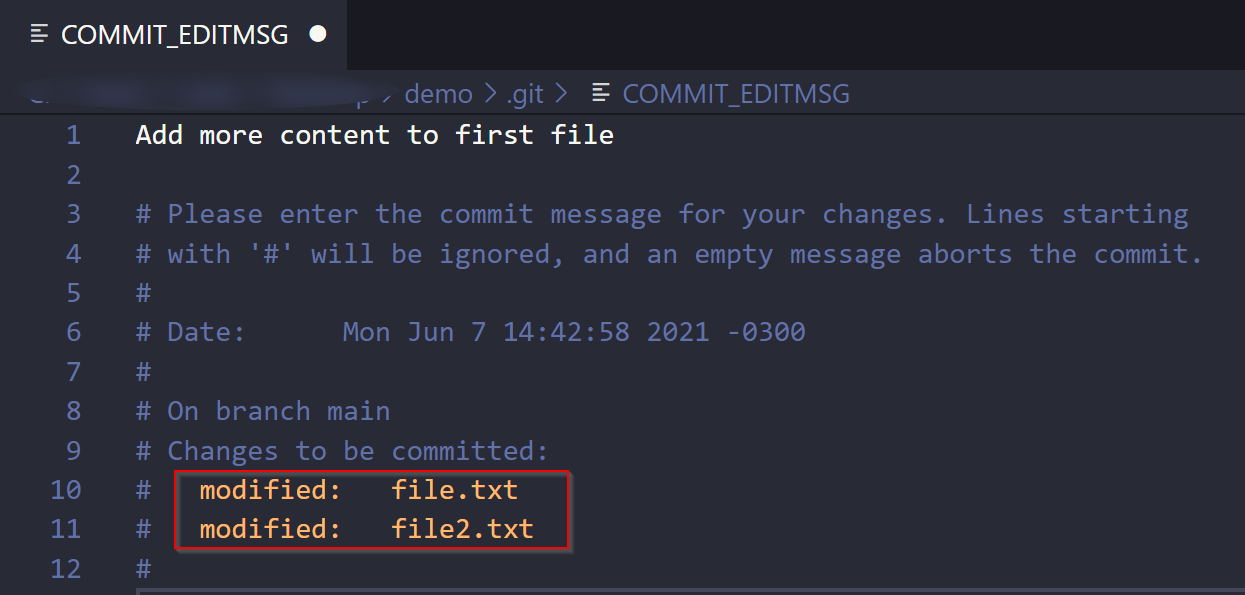
As you can see, now both files are listed as modified. Just edit the message to your liking, save the file and close the editor, and Git will do the rest.
Reverting a Commit
As I’ve said, amending commits results in rewriting history, which can be OK... but often it isn’t.
What should you do if you need to fix a commit—more specifically, “delete” it—but said commit is already part of public history?
In such cases, you should use the git revert command. It creates a new commit whose changes are the exact opposite of the commit to be reverted.
To learn more about this command—and other ways to undo things in Git—you can read our post about it.

Commit Early, Commit Often, Perfect Later!
In this post, we’ve offered you a guide on the git commit command. You’ve learned what a commit is, why it’s important, and how you do it in several different scenarios.
One important question still left unanswered is the “when.” When working on a project, when and how often should you commit?
As a rule of thumb, each commit should be atomic—that is, refer to a self-contained group of changes. On the other hand, it’s helpful to commit as often as possible, since commits are safe points. It is possible to lose uncommitted information in Git. Losing committed work, while also possible, is dramatically less likely, so you’re better off committing as often as you can.
What’s the solution, then? Easy: Commit early and as often as possible. Then, use the powerful Git commands to rewrite history—before it’s made public, of course—to allow for a cleaner and more readable history. That way, you gain the best of both worlds.
This post was written by Carlos Schults. Carlos is a consultant and software engineer with experience in desktop, web, and mobile development. Though his primary language is C#, he has experience with a number of languages and platforms. His main interests include automated testing, version control, and code quality.


