

*article updated on September 26, 2024
I've covered how to improve the written component of your documentation with automated spell-checking and suggestions for better writing. In this post, we'll explore the code component of good documentation.
The techniques for testing code fall into two distinct camps, depending on what you're testing. We will look at one example in detail and then link to alternatives with similar functionality.
Testing API Examples with Dredd
Whether you generate your API documentation from the source code or write it externally, the more distinct nature of your API makes it easier to test. Tooling options also frequently offer the auto-generation of examples as well as tests, automating even more mundane tasks for you.
Dredd
I have had the most experience with using Dredd. It works with API documentation outlined in the swagger and API blueprint formats, so documentation is written externally to your API source code.
I will use the Marvel API as an example for this section. Instead of attempting to create an entire API definition of the API from scratch, I found an existing API Blueprint file floating on the internet and created a demo project around it. You can find the project on GitHub.
I'll only cover the essentials of what's inside the projects. Otherwise this article would turn into a fully fledged API Blueprint and Dredd tutorial.
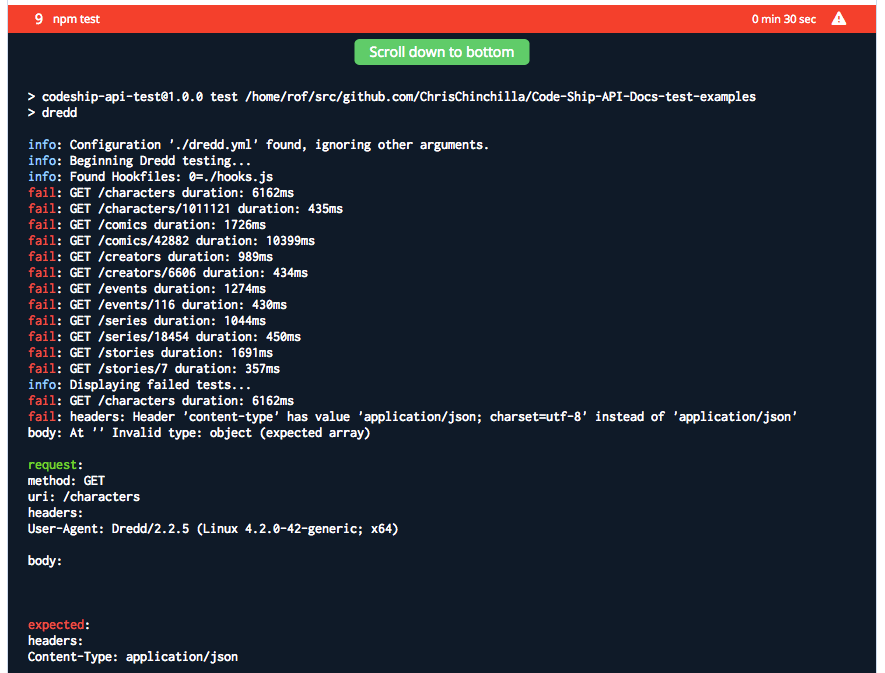
The API definitions in the file I found are out of date, so running the tests will fail. I decided to leave this as is for a couple reasons. First, you'll still be able to appreciate the setup process for Dredd and its potential. Also it's unlikely that you want to test the Marvel API. Unless you work for Marvel, in which case, release an updated file 😝.
As Dredd integrates with Node and npm, you can use the default setup with a new Codeship project, selecting node.js as the language of the project.
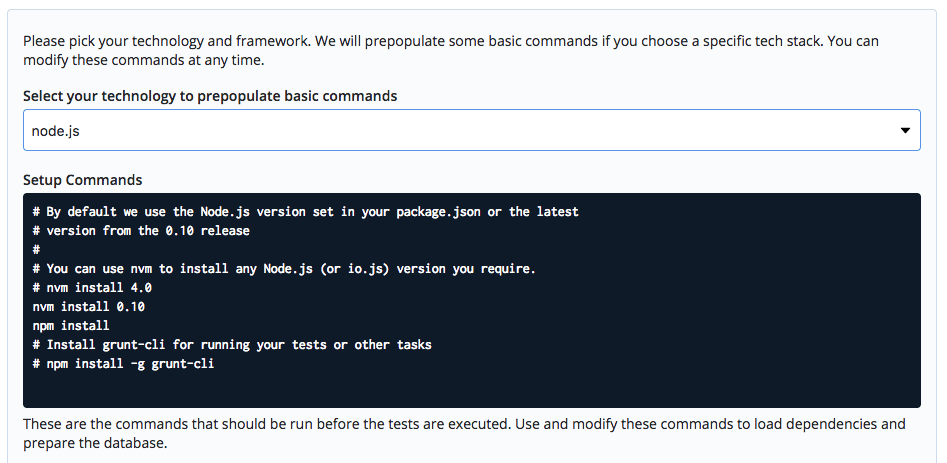
The dependencies defined in package.json are:
LANG:code
...
"dependencies": {
  "dredd": "^2.2.5",
  "md5": "^2.1.0",
  "dotenv": "^2.0.0"
}
...
With most needed for using the Marvel API, not Dredd.
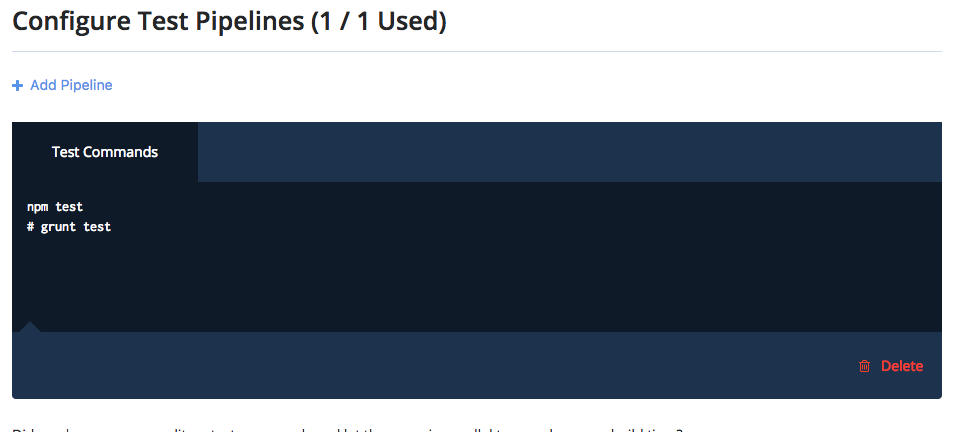
And the test command defined in package.json is:
LANG:code
...
"scripts": {
   "test": "dredd"
 }
...
The final piece of the setup puzzle is the dredd.yml configuration file, which you can auto-generate with the dredd init command. The overridden settings are:
LANG:yaml
hookfiles: ./hooks.js
language: nodejs
config: ./dredd.yml
blueprint: marvel.apib
endpoint: 'https://gateway.marvel.com:443/v1/public/'
You can find more here about Dredd configuration in their documentation.
You can find the API definitions in the marvel.apib file, which are a series of endpoints, with parameters passed to them and an expected response. The API Blueprint format is standard markdown with extras added for API modeling, which means it's well-suited for adding good explanatory text around the API definitions.
All calls to the Marvel API need an apikey parameter appended, constructed in a slightly complicated way. You could add this as a parameter to every endpoint definition, but there's a much better way.
Dredd's 'hooks' feature allows you to interrupt the processing flow and make amendments. The hooks.js file below interrupts every API call before it's sent to the API and adds the apikey that the Marvel API expects:
LANG:js
'use strict';
require('dotenv').config();
var hooks = require('hooks');
var md5 = require('md5');
hooks.beforeEach(function (transaction) {
  var publicKey = process.env.MARVEL_PUBLIC_KEY;
  var privateKey = process.env.MARVEL_PRIVATE_KEY;
  var ts = String(new Date().getTime());
  var hash = md5(ts+privateKey+publicKey);
  transaction.fullPath = transaction.fullPath + '?ts=' + ts + '&apikey=' + publicKey + '&hash=' + hash ;
});
Now, whenever you push to the repository, Codeship will run the tests you've defined. As I mentioned, the build will currently fail, as the expected response doesn't match the actual response. If you want to experiment and learn further, then you can try updating the API Blueprint file to match the new response structure. Or spend that time making Dredd work with your own API.
Other options
If you want to use a SaaS to design/host/test your APIs, then a quick search will show that there are dozens of options. Here's a quick roundup of other open-source and free options; not all work that well within a CI context.
- Postman: Better known as a desktop app, you can also automate Postman.
- Soap UI: Primarily a desktop application, but possible to automate on certain platforms.
- Roll your own: Testing an API is a series of HTTP calls with parameters and an expected response, so coding your own and connecting it to a CI is not too complicated.
Testing Code Examples
Aside from API documentation, I hope you also have a series of tutorials that help users assemble the API components into something useful. These will frequently contain snippets of code that readers follow. How many times have you tried one that didn't work?
Automatically testing these snippets is a fantastic idea, but it's unfortunately hard to do. This is due to the nature of a code snippet; it's an abstract extraction of an application, so how can you test it with no context?
It can work with certain languages, such as SQL, which are discrete commands that a CI tool can run and test, or small, simple code snippets that can work in isolation.
I have had a couple of ideas suggested to me as a general solution to this problem, but I haven't implemented any yet. One is to extract each code snippet from a document, generate separate files for the code, and test those. Another is to make sure that each snippet can work in isolation from the rest of the application and is thus testable, but this leads to less understandable documentation.
Creating and testing code examples with Sphinx
After that lengthy disclaimer (and food for thought), there is one concrete tool out there for Python developers: Sphinx. Sphinx is a mature documentation project primarily aimed at Python developers but usable (to varying degrees of functionality) by other developers. Generally, the Python community has the best documentation tools; it's a pity I don't work with more Python-based projects.
The Sphinx project has great installation and Getting Started guides, so follow those first.
Follow the sphinx-quickstart option. The installer will ask if you want to include the doctest extension (the magic extensions), so select y.
Continuing the Getting Started guide will give you more information on reStructuredText and Sphinx. For this article, I will create an example to test. You can find the final project on GitHub.
In the index.rst file, add the following:
LANG:python
.. testsetup:: *
  import os
Look at this great example:
.. doctest::
  >>> sum((2, 2))
  4
Test-Output example:
.. testcode::
  sum((2, 2))
This would output:
.. testoutput::
  4
There's some cool syntax here. First testsetup lets you add code needed for the example to work but that a reader won't actually see. The doctest shows the code example that the user will see and the expected result. The testcode and testouput pair are equivalent to the doctest, but separated. Pick whichever option you like the most.
Now you can run:
LANG:code
make doctest
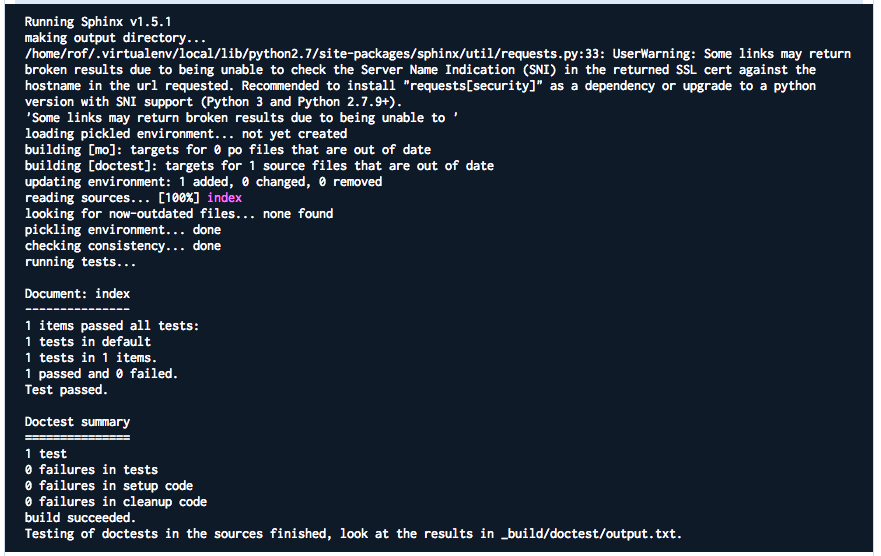
This will use the auto-generated Makefile to run the doctest task, which should succeed with the following output:
LANG:yaml
Document: index
---------------
1 items passed all tests:
   1 tests in default
1 tests in 1 items.
1 passed and 0 failed.
Test passed.
Doctest summary
===============
    1 test
    0 failures in tests
    0 failures in setup code
    0 failures in cleanup code
build succeeded.
Testing of doctests in the sources finished, look at the results in _build/doctest/output.txt.
To get this working with Codeship, create a new project and set it as a Python project. Leave the commands as default; the GitHub repository contains the requirements.txt file needed.
Remove what's in the test pipeline section and add the make doctest command. Save the project and trigger a build.
And voilà, as expected, you can be assured that your code examples are usable by readers.
What's Next in Automating Documentation?
And that's it! In the next and final installment of this series of posts, I will look at automating screenshots. If you have comments and suggestions, please let me know below. I'd especially like to know if you have solutions to the tooling gaps I identified throughout the article.


