

In this article we will see how we can deploy a ASP.NET framework application as Docker containers on Windows Server. We will adopt a "lift and shift" model where we will treat our web application as a blackbox and only change how it's deployed and made available to our users.
Although a standalone Docker container running Microsoft Internet Information Services (IIS) server is sufficient for making the web application available to the world, we will instead create a reverse-proxy setup using Traefik. This will give us some nice features such as being able to route requests to a different IIS site, automatic SSL certificates using LetsEncrypt, SSL termination including Server Name Indication (SNI) and aim to achieve zero-downtime deployments.
The following figure depicts the proposed architecture.
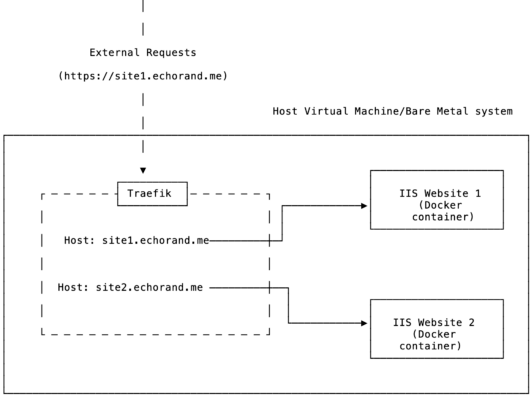
One point worth noting here is that site1.echorand.me and site2.echorand.me are valid publicly available DNS records that I have setup for the purpose of this article. This is relevant because LetsEncrypt needs the DNS records to be public and resolve correctly to issue SSL certificates. On Amazon AWS, I have created two record sets in my Route53 zone and pointed them to the public IP address of my EC2 instance.
During the course of this article, we will be working with Docker on Windows (Windows Server 1803), Traefik, nssm and PowerShell.
Software setup
We will be using Windows Server 1803 as our base operating system both for building our container and deploying our application. Windows Server 1803 is available in Amazon Web Services marketplace (search for Windows_Server-1803-English-Core-Containers). These Amazon Machine Images (AMIs) come with docker engine installed.
We will be using the latest release of Traefik which at the time of writing is 1.7.4.
Our sample web applications are two ASP.NET Web API applications using .NET framework 4.6.1 created using Microsoft Visual Studio 2017 (15.7.3).
The sample web application along with other helper PowerShell scripts are available in the demo1 sub-directory of this repo. In the rest of this article, I will assume that you have a local clone of this repository on the Windows server system.
Sample web application
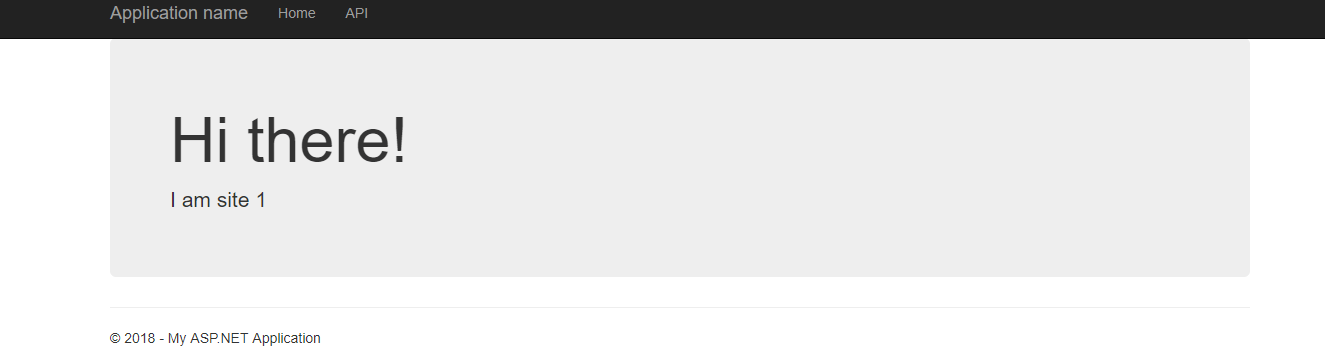
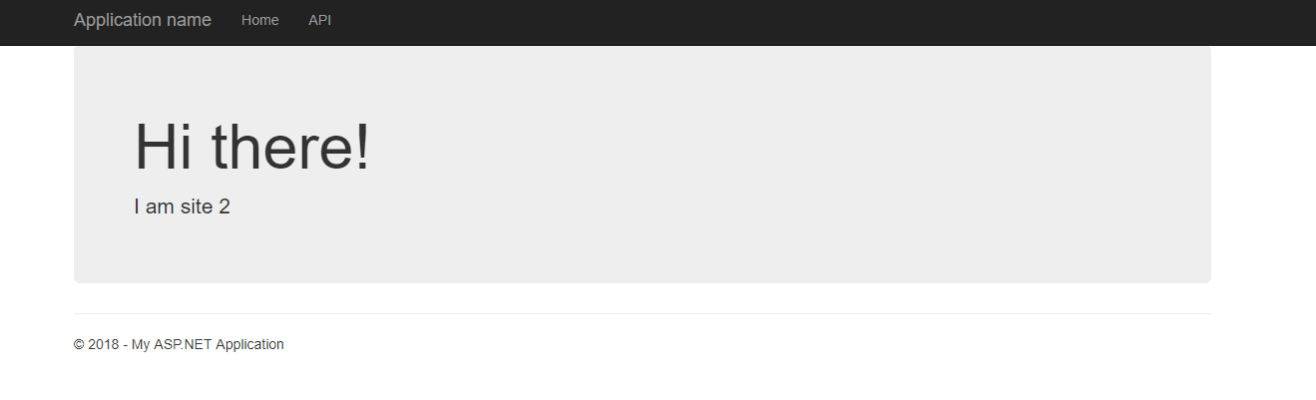
Our sample web application is composed of two projects site1 and site2 - each an ASP.NET Framework Web API site.
If we build and view the sites locally, their homepages look as follows:
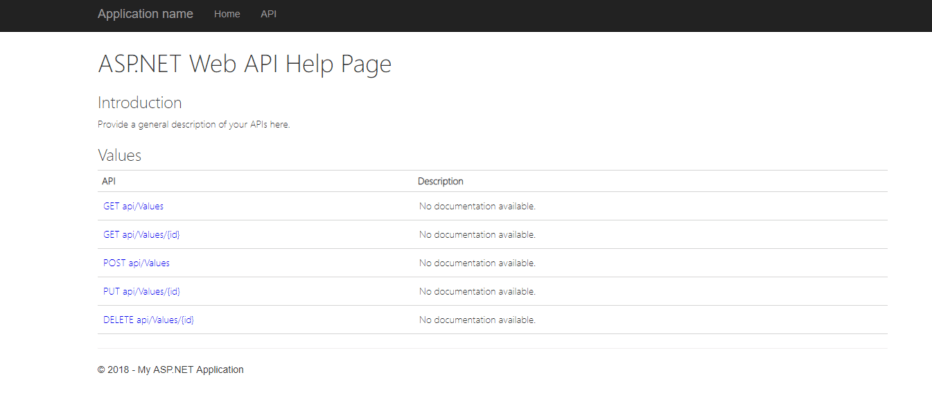
Each site in turn has a number of API endpoints which can be browsed via clicking on Help on the respective site:
The Visual Studio solution can be found in the demo1/AspNetFrameworkDemo sub-directory.
Setting up Docker
If you are using an AMI from the AWS market place, we will already have Docker installed:
LANG:yaml
PS C:\Users\Administrator> docker version
Client:
 Version:      17.06.2-ee-16
 API version:  1.30
 Go version:   go1.8.7
 Git commit:   9ef4f0a
 Built:        Thu Jul 26 16:43:19 2018
 OS/Arch:      windows/amd64
Server:
 Engine:
  Version:      17.06.2-ee-16
  API version:  1.30 (minimum version 1.24)
  Go version:   go1.8.7
  Git commit:   9ef4f0a
  Built:        Thu Jul 26 16:52:17 2018
  OS/Arch:      windows/amd64
  Experimental: false
If, however, you need to install the latest Docker engine on Windows server, you can follow the instructions from Docker.com.
Building a Docker image
Each site will be deployed as a separate Docker container. In the same directory as the solution file, we have Dockerfile.site1 and Dockerfile.site2 corresponding to each site. The Dockerfile.site1 is as follows:
LANG:dockerfile
# escape=`
FROM microsoft/dotnet-framework:4.7.2-sdk-windowsservercore-1803 AS builder
SHELL ["powershell", "-Command", "$ErrorActionPreference = 'Stop'; $ProgressPreference = 'SilentlyContinue';"]
ADD . /app
WORKDIR /app
RUN nuget restore; `
    msbuild
FROM microsoft/aspnet:4.7.2-windowsservercore-1803
RUN powershell -NoProfile -Command Remove-Item -Recurse C:\inetpub\wwwroot\*
WORKDIR /inetpub/wwwroot
COPY --from=builder /app/site1 .
HEALTHCHECK --start-period=30s --interval=10s `
    --timeout=120s --retries=3 CMD powershell -Command Invoke-WebRequest -UseBasicParsing http://localhost
We use Docker multi-stage build to create the final image such that doesn't have build tools installed. We configure a healthcheck using the HEALTHCHECK instruction which will be used by Traefik to determine whether to forward requests to a container or not.
Ideally, we will be using a continuous integration (CI) service to build our Docker images and push them to a Docker registry. However, at the time of this writing, I could not find a free hosted CI service which supports Windows Server 1803 container building. Hence, we will build the images manually on the same host as the one we will deploy our application on.
From the Git clone of the repository:
LANG:yaml
# repository clone
..
C:\> cd traefik-aspnet-demos\demo1\AspNetFrameworkDemo
C:\> .\BuildDockerImages.ps1
...
The result of this step should be two Docker images amitsaha/aspnetframework-demo-site1 and amitsaha/aspnetframework-demo-site2 each tagged with the Git commit hash of the HEAD.
Brief overview of Traefik
Traefik is an open source reverse proxy with a massive feature list. It is deployable as a single binary which makes the deployment experience simple. At the highest level, we set up Traefik with a list of frontends, a list of backends and then define rules which map the frontend to the backends. Traefik can discover backends via a number of providers including docker. The Docker integration makes use of Docker labels to provide a native integration experience and is straightforward to setup.
Setting up Traefik as a Windows service
We will download Traefik and use nssm to set up a Traefik windows service using the PowerShell script - TraefikSetup.ps1.
The script also copies a configuration file for Traefik which is a TOML file configuring various aspects of a Traefik deployment. The documentation demonstrates various examples.
In our case, the Traefik configuration file is available here. Let's go over the main sections:
LANG:json
logLevel = "DEBUG"
defaultEntryPoints = ["http", "https"]
[entryPoints]
  [entryPoints.http]
 address = ":80"
   [entryPoints.http.redirect]
  entryPoint = "https" [entryPoints.https]
 address = ":443"
 [entryPoints.https.tls]
We set the log level to DEBUG since it may be useful to look at the logs especially when things go wrong. Then, we setup the http and https entrypoints on port 80 and 443 respectively. We also setup a default redirect from http to https.
Next, we setup up LetsEncrypt configuration and specify that we want to use the http challenge:
LANG:dockerfile
 [acme]
email = "amitsaha.in@gmail.com"
storage = "acme.json"
entryPoint = "https"
onHostRule = true
[acme.httpChallenge]
entryPoint = "http"
Finally, specify the Docker provider configuration:
LANG:code
[docker]
watch = true
endpoint = "npipe:////./pipe/docker_engine"
watch specifies Traefik to watch Docker events and update it's configuration if needed. endpoint specifies the Windows named pipe that the Docker engine listens on by default.
Once you run the above setup script, confirm that Traefik is running from a new PowerShell window:
LANG:yaml
C:> nssm status traefik
SERVICE_RUNNING
Running our web applications
Let's now run our web applications using a script available in our repository:
LANG:code
PS C:\traefik-aspnet-demos\demo1\DeployScripts> .\DeploySites.ps1 -GitHash $(git rev-parse -q HEAD)
...
...
Once the script exits, from a browser on our local system, we should be able to see our site 1 at https://site1.echorand.me and site 2 at https://site2.echorand.me. You may need to check your cloud provider's network access control lists and security group rules to allow incoming traffic on port 443 and port 80 (for LetsEncrypt HTTP validation). You will also likely need to update our Windows firewall setting to allow traffic:
LANG:yaml
C:> New-NetFirewallRule -DisplayName "Allow TCP 443" -Direction Inbound -Action Allow -Protocol TCP -LocalPort 80
C:> New-NetFirewallRule -DisplayName "Allow TCP 443" -Direction Inbound -Action Allow -Protocol TCP -LocalPort 443
The PowerShell script we ran above (DeploySites.ps1) does a few things. Let's go over the main bits:
LANG:yaml
C:> docker run `
     --label "traefik.backend=site1"`
     --label "traefik.frontend.rule=Host:site1.echorand.me" `
     --label "traefik.port=80"`
     --label "traefik.backend.healthcheck.path=/" `
     --label "traefik.backend.healthcheck.interval=5s"`
     --label "app=${Image1}" `
     --label "version=$GitHash" -d "$($Image1):$($GitHash)"
We add a number of labels to each container to aid discovery by Traefik:
- traefik.backend: The backend which the container is part of.
- traefik.frontend.rule: The matching rule for this container is Host: site1.echorand.me
- traefik.port: Container port to which traefik should forward the request to
- traefik.backend.healthcheck.path: Healthcheck URL to hit the container
- traefik.backend.healthcheck.interval: Healthcheck interval
The other two labels, app and version identify which application and version this container is running.
The second part of the script:
- Waits for the deployed containers to become healthy.
- Removes the old containers from the host.
The following is the relevant snippet:
LANG:bash
$container=docker ps --filter "label=app=${image}" --filter "label=version=${GitHash}" --format '{{.ID}}'
$health=docker inspect --format '{{ .State.Health.Status }}' $container
while ($health -ne 'healthy') {
  $health=docker inspect --format '{{ .State.Health.Status }}' $container
  Start-Sleep -s 10
 }
$OldContainer=docker ps --filter "label=app=${image}" --filter before=$container --format '{{.ID}}'
if ($OldContainer)
{
    Write-Output "Shutting down $image"
    docker exec $OldContainer powershell -Command Stop-WebAppPool -Name "DefaultAppPool"
    Start-Sleep -s 30
    docker rm -f $OldContainer
}
It's a good idea to check if the new containers have been registered by Traefik and the old containers have been deregistered before terminating the old ones. One limitation of using the Docker native integration is due to a limitation of the Docker engine not supporting updating labels at runtime. Hence, for example even though Traefik supports weighted load distribution, we cannot vary the weight at runtime for a Docker container. In such a case, using the Traefik file backend and writing a custom utility to render this file with the backend configuration may be required.
Traefik doesn't yet support native blue-green deployment, but using the above approach we can achieve something close to it.
Conclusion
In this article, we saw how we can deploy a ASP.NET framework application on Windows server as Docker containers. To enable straightforward request routing and seamless deployments, we used Traefik as a reverse proxy for our setup.
Additional resources
- Read more about Traefik's benefits
- Build cloud apps using Civo and Docker


