


Please read the Scaling Jenkins agents article first. It explains the reasoning behind the setup we are about to make.
I will assume that you have a Jenkins instance up and running and that you know how to setup on-premise agents. Unless you are running the entire infrastructure on AWS, those agents should be used to guarantee the minimum availability. As a rule of thumb, the number of on-premise agents should be calculated in a way that (close to a) hundred percent utilization is accomplished at all times. Anything higher than that should be set up on AWS. We'll configure them so that new agents are created when needed, and unused ones are destroyed after a short period of inactivity. In this setting, you'll be able to meet any demand, thus accomplishing high availability and, at the same time, you'll pay only when agents are used. In other words, we'll combine the best of both worlds (on-premise with AWS). Bear in mind that I refer to high availability only in the context of Jenkins agents. High availability of Jenkins controllers is a different problem that can be solved through the High Availability Plugin included in the CloudBees Jenkins Platform .
Let's get our hands dirty.
The first thing we should do is create an AWS user that will be used by Jenkins when connecting to your AWS account.
Create an AWS account (if you do not have it already) and open the Identity and Access Management screen. You'll see the Users link in the left-hand menu. Click it. You will be presented with the screen that allows you to create new users, or edit the existing ones. Click the Create New User button, enter jenkins as the first user, and click the Create button. You will be presented with the screen with User Security Credentials . Click the Download Credentials button located in the bottom-right corner of the screen. We'll need that file later. Click the Close button to return to the list of users. You'll see jenkins , together with other users you might have created earlier.

The fact that we created the new user does not mean that it has necessary permissions. Let's attach a policy.
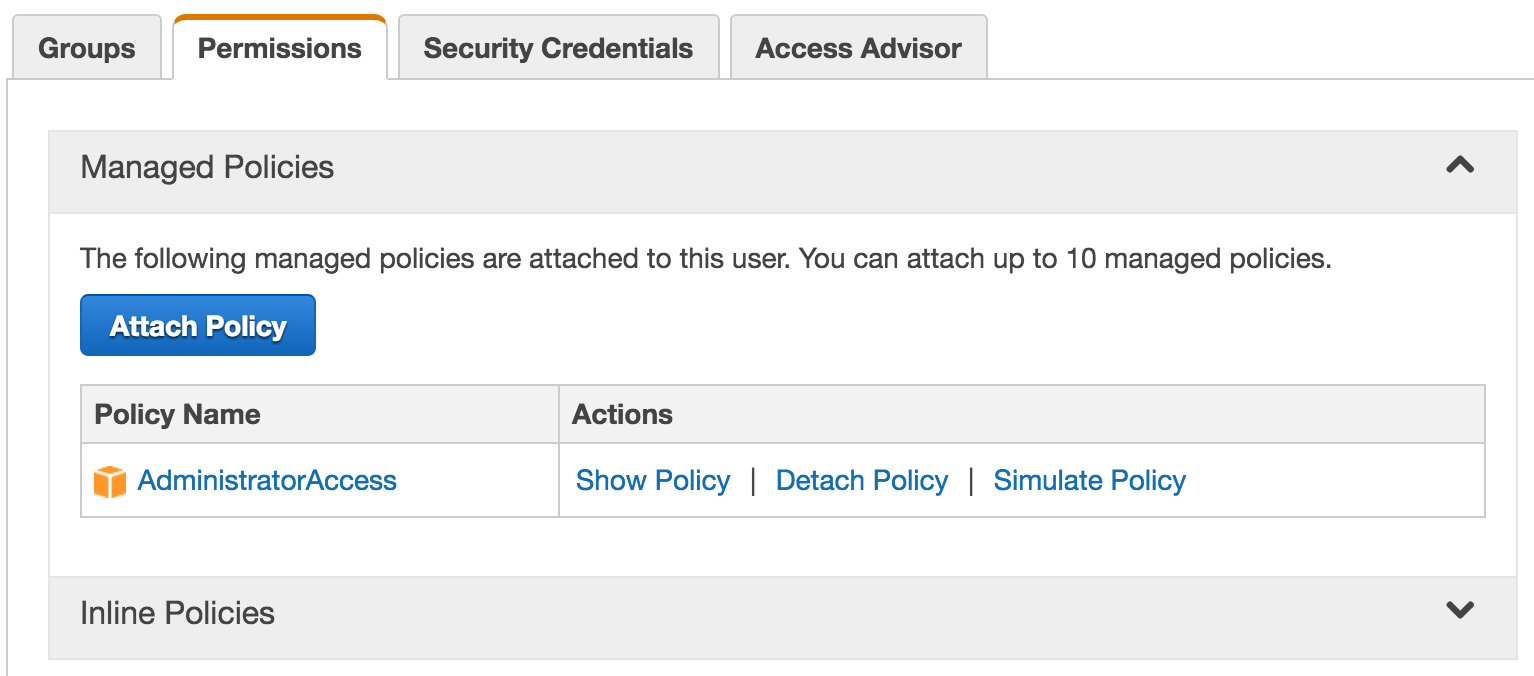
Click on the row with the newly created user, followed by the Attach Policy button. We'll try to keep things simple and attach the AdministratorAccess policy. It should do as a demonstration. In your production setting, please try to be more restrictive and attach only the policies with minimum permissions.
Moving on. Select the AdministratorAccess and click the Attach Policy button located in the bottom-right part of the screen. With the user created with the administrative permissions, we can proceed and create a security group for your region.
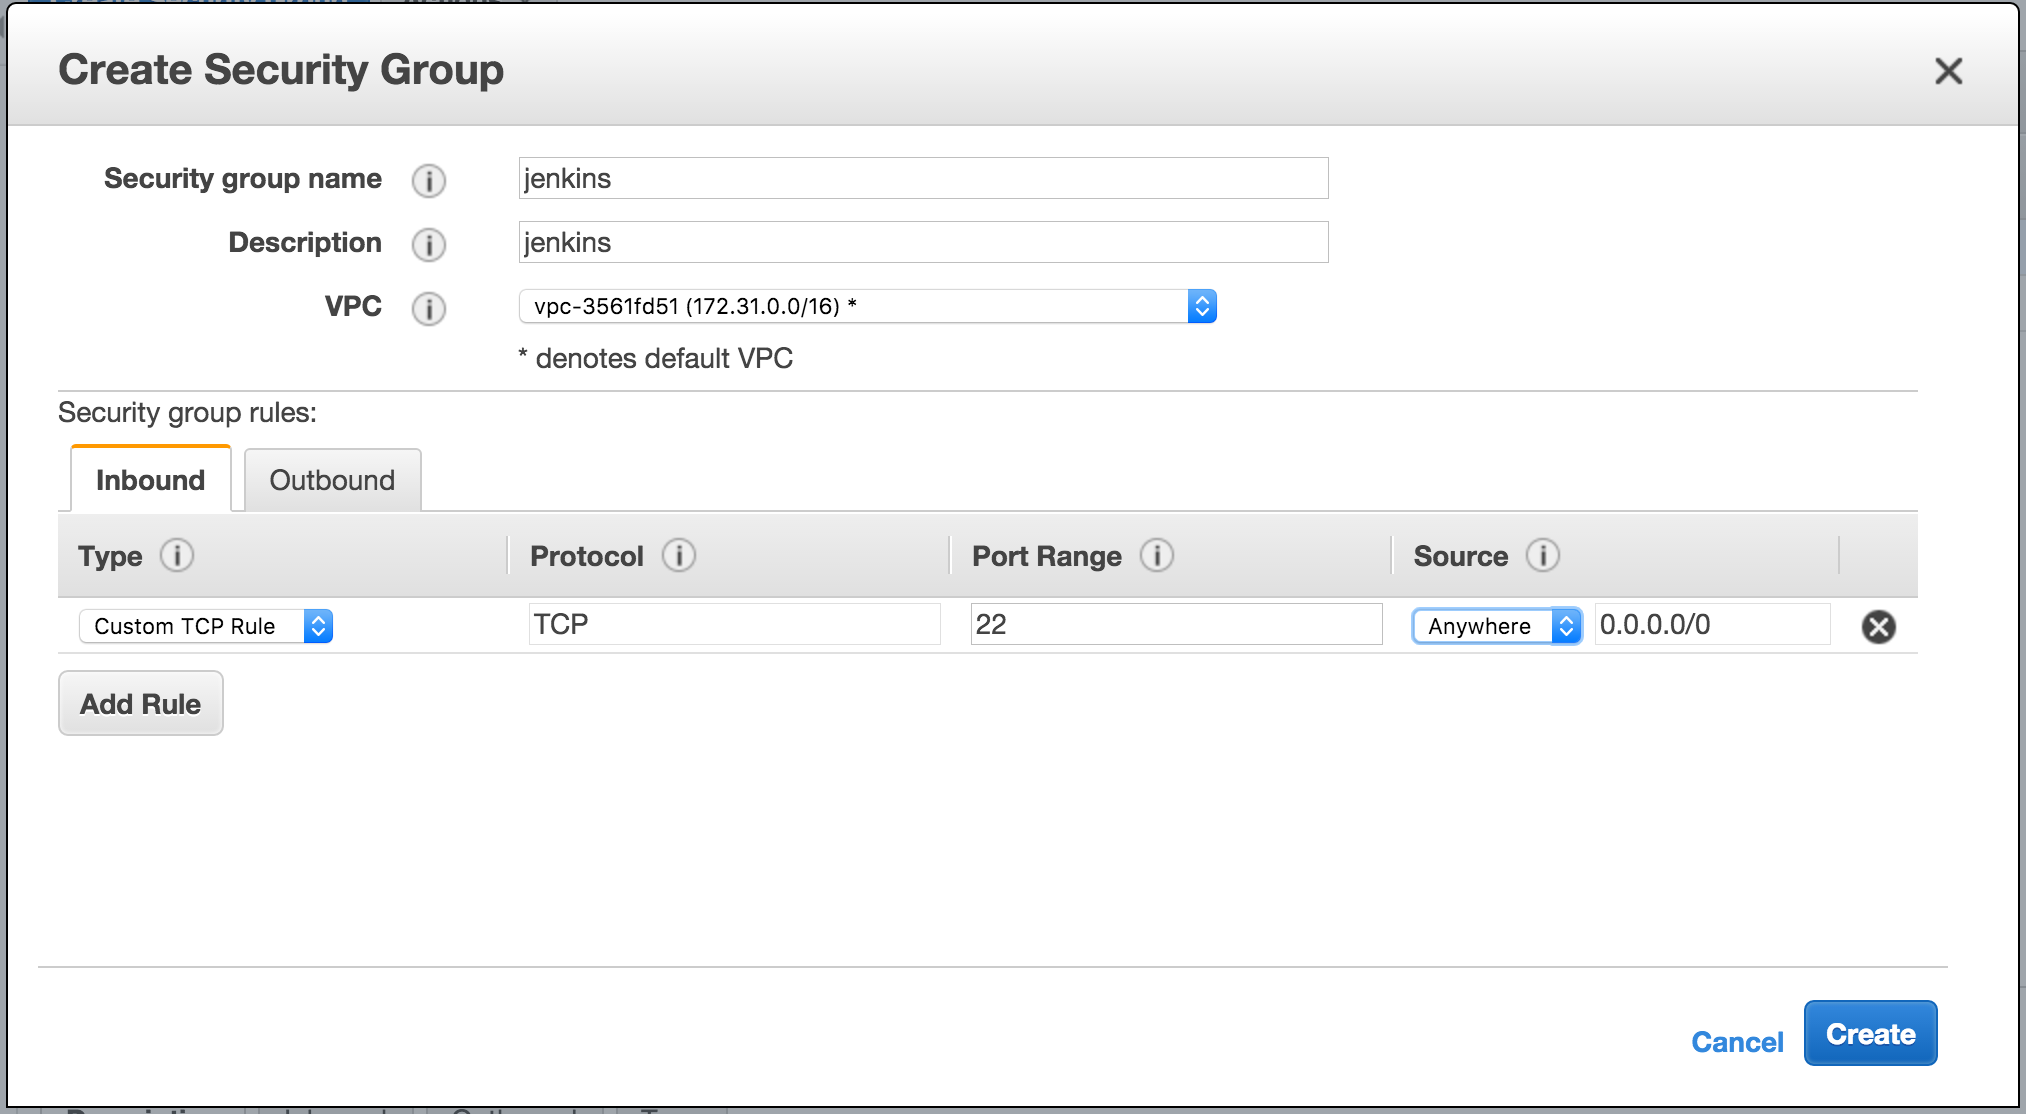
Please open the EC2 screen. We'll create a security group that depends on a region, so start by select one from the drop-down list located in the upper-right part of the screen. I will use US East (N. Virginia) throughout the rest of the article. Feel free to use any other that fits your needs better. Click the Security Groups link located in the left-hand menu, under the Network & Security group. Click the Create Security Group button, and type jenkins as both Security Group Name and Description (I'm aware that naming things is not my strongest skill). The next step is to create an inbound rule. Click the Add Rule button under the Inbound tab. Jenkins uses the port 22 to connect to agents through SSH, so let's open it. Type 22 as the Port Range and select Anywhere as the Source . Again, this setting is for demonstration only, and you should be more restrictive. Once you're done, click the Create button. The next in line is the creation of SSH key pair.
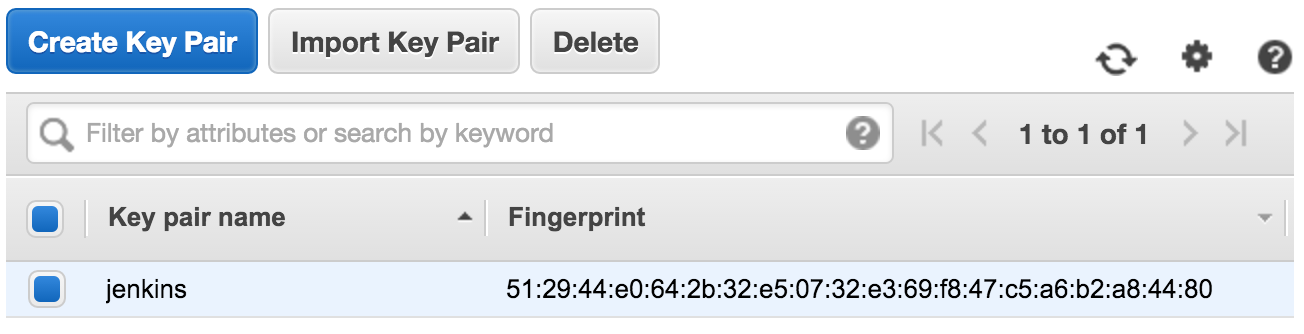
To create an SSHkey pair, please click the Key Pairs link located on the left-hand menu, under the Network & Security group. You'll see the Create Key Pair button. Click it, type jenkins as the Key pair name , and, finally, click the Create button. The jenkins .pem file will be downloaded, and we are left with only one more task before we switch to Jenkins. We'll find an Amazon Machine Image (AMI), that we'll use to host our Jenkins agents.
While you can choose a public image to host your Jenkins agents, I strongly recommend creating your own. I won't go into details how to do that but only provide quick tips for those unfamiliar with AWS. Open the Instances screen, launch a new instance, connect to it through SSH, install all the software your need, and, finally, convert it into a new image. Please consult the Creating an Amazon EBS-BackedLinux AMI page for more information. Google is your friend if you prefer a Windows image. Now, let's get back to AMIs.
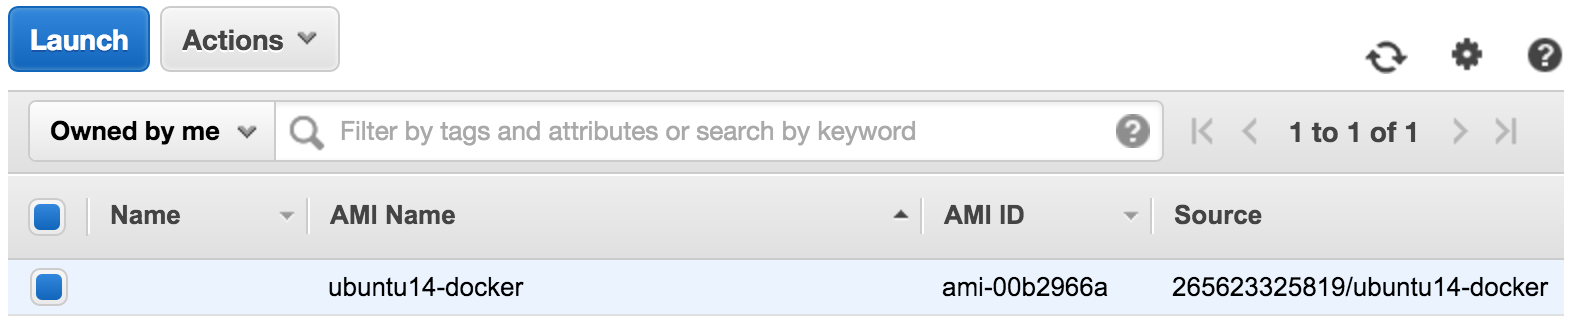
Please open the AMIs screen. It can be reached through the AMIs link located in the left-hand menu under the Images section. You will see the AMI ID column. Remember the value, copy it somewhere, or keep this window open. We'll need it soon. In my case, I'll use my image based on Ubuntu 14, with JDK and Docker installed. Please keep in mind that Java is mandatory, and the rest depends on your needs.
That was it, on the AWSside. Now we can turn our attention towards Jenkins, and setup EC2 agents.
Please open the Jenkins Manage Plugins screen located in the Manage Jenkins page. If you do not have it already installed, click on the Available tab, select the Amazon EC2 plugin , and click the Install without restart button. Once the plugin is downloaded, open the Configure System screen, and scroll to the Cloud section. Select Amazon EC2 from the Add a new cloud drop-down list, and you will be presented with a form where we'll put the information Jenkins require to create EC2 agents.
We'll name it ec2-agent . Do you remember the credentials.csv file we downloaded earlier? Now it's time to put it to use. Open the file and copy&paste values into the Access Key ID and the Secret Access Key fields. Select the same region you choose in EC2 and paste the contents of the jenkins .pem file into the EC2 Key Pair's Private Key field. Feel free to use the Test Connection button to verify that everything has been set up correct.
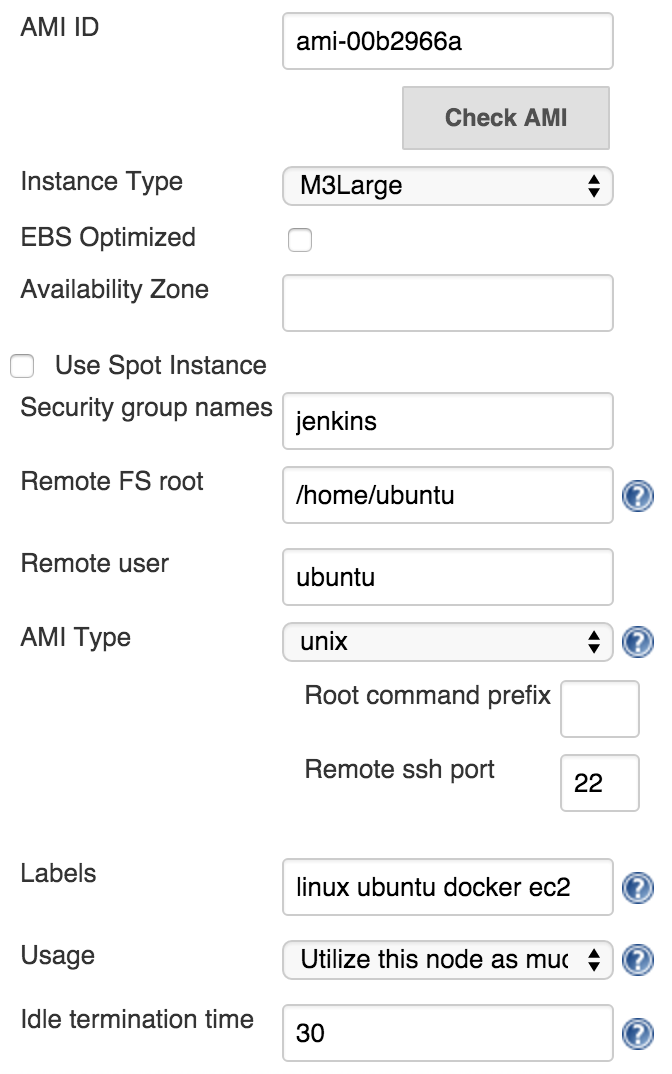
Now that Jenkins is indeed able to connect to your AWS account, let's add one AMI. Click the Add button, fill in some description, and paste the AMI ID . Select the Instance Type , specify the Remote FS root (mine is /home/ubuntu ), and the Remote user (mine is ubuntu ). Please note that available instance types, the FS root, and the user, depend from one image to another. In most cases, they are specified by the vendor of the image you used as the base for creating your own. Please use jenkins as the Security group names , and do not forget to specify labels (mine are linuxubuntu docker ec2 ). Efficient usage of Jenkins agents depends on them.
One of the important fields is the Idle termination time . It defaults to thirty minutes. What it means is that after specified inactivity, a agent created through this configuration will be terminated, saving you from unnecessary fees. The trick is to balance two factors. It takes some time until a new EC2 is instantiated. If the termination time is too low, you might end up spending too much time waiting for an instance to start. On the other hand, if the time is set to too high a number, you'd be paying too much for inactive agents.EC2 is instantiated. If the termination time is too low, you might end up spending too much time waiting for an instance to start. On the other hand, if the time is set to too high a number, you'd be paying too much for inactive agents.
Feel free to "play" with other fields and set them up to fit your needs. Once you're done, click the Save button.
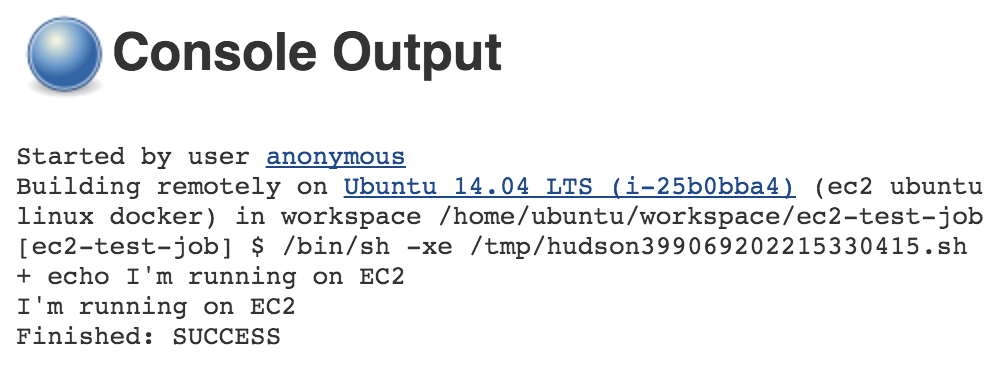
All that is left is to create a new Jenkins job that is restricted to one of the labels we just set (or use an existing one). When a build of that job starts, it will create a new EC2 agent and, once it is initialized, run the build on top of it (unless the same label is set for one of the dedicated and unused agents). When the build is finished, and the specified amount of idle time is reached, the EC2 instance will be removed and, with it, charges to your AWS account.
This article was, hopefully, helpful in describing a different, not to say more efficient, approach to setting up agents.


