

This blog post is the fifth article in a six-part series on Jenkins configuration as code.
Using Jenkins configuration as code, one can manage the Jenkins controller configuration with simple, declarative YAML files and manage them as code. How do you write such YAML files?
How to wr

ite YAML config file?
Are you supposed to guess the format? Actually you could. JCasC uses the internal data model of the Jenkins component, and in many cases those are just the exact same ones as the web user interface (UI) form element you used to set. Look at this sample below.
LANG:yaml
Jenkins:
systemMessage: "Jenkins managed by Configuration as Code"

securityRealm:
  ldap:
    configurations:
      - server: ldap.acme.com
    cache:
      size: 100
      ttl: 10
    userIdStrategy: CaseInsensitive
    groupIdStrategy: CaseSensitive
And compare it to the web UI you used to configure manually.
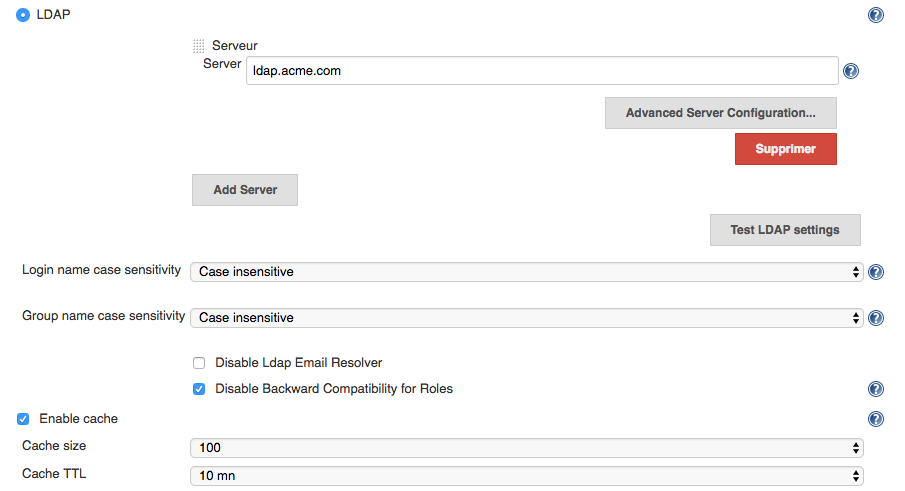
Sound familiar? This is by intent. We consider the web UI as some natural documentation, which ensures you don’t need to study a long reference documentation before you can actually start using Jenkins configuration as code.
Ok, but I still want some doc!
And you’re right. We made our best to make the YAML syntax reflect the web UI, but anyway we still want to produce the reference and exhaustive documentation you can rely on just in case or are in doubt.
So Jenkins configuration as code produces a detailed documentation on the YAML syntax. This documentation lists available attributes for each and every YAML element, possible values, constraints and documentation for it. As available elements depend on the installed plugins, this documentation is generated dynamically from your live Jenkins instance.
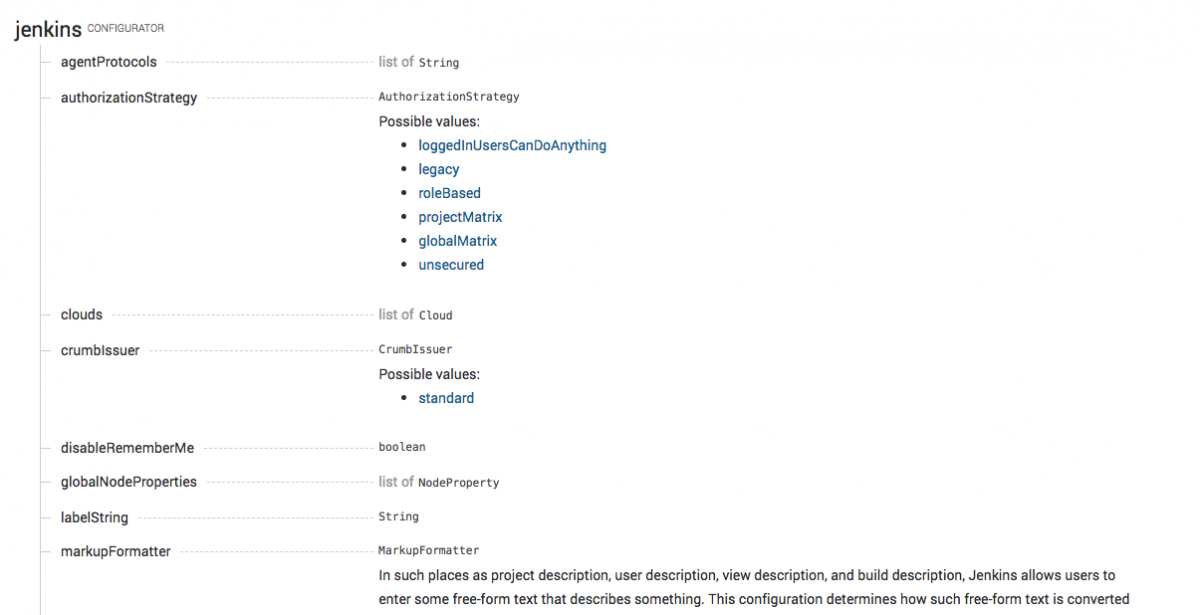
We also generate a Json schema so your IDE or favorite YAML editor can help you write this configuration.
We plan to provide more tools to help end-users write their configuration and check it is valid before it actually gets applied to the Jenkins controller, or to assist editing with IDE support. In the meantime, Jenkins configuration as code provides a check REST API so you can dry-run a configuration file on your controller before it gets applied.
Ok, so what’s next?
You can read more about the Jenkins configuration as code plugin on the project’s GitHub repository. To chat with the community and contributors join our gitter channel . Or come see us in person at DevOps World | Jenkins World 2018 to discuss the JCasC project and its future!
Also don’t miss next post from the Jenkins configuration as code series...
Additional resources
Jenkins Configuration as Code: Look Ma, No Hands
Jenkins Configuration as Code: Sensitive Data


