

The web of the future is encrypted and every site should have HTTPS enabled. Resources such as cookies, images, scripts, and HTML can be exploited, so good practice in web development is to make sure every resource accessed by users on your website is encrypted.
Let's Talk About SSL Certificates
As you may know, HTTPS (Hyper Text Transfer Protocol Secure) is the secure version of HTTP, the transfer protocol of the web. HTTPS encrypts data between a user and your web application, but for this to happen, you need an SSL certificate. You can get a valid SSL certificate from a certificate authority such as Comodo for a premium.
On the other hand, if you're okay with 90-day certificates and some customization limitations, Let's Encrypt is a free, automated, and open certificate authority made by the nonprofit Internet Security Research Group. Let's Encrypt provides a digital certificate that you can use to enable HTTPS on any website. They've also recently rolled out support for wildcard certificates.
Wildcard SSL certificates
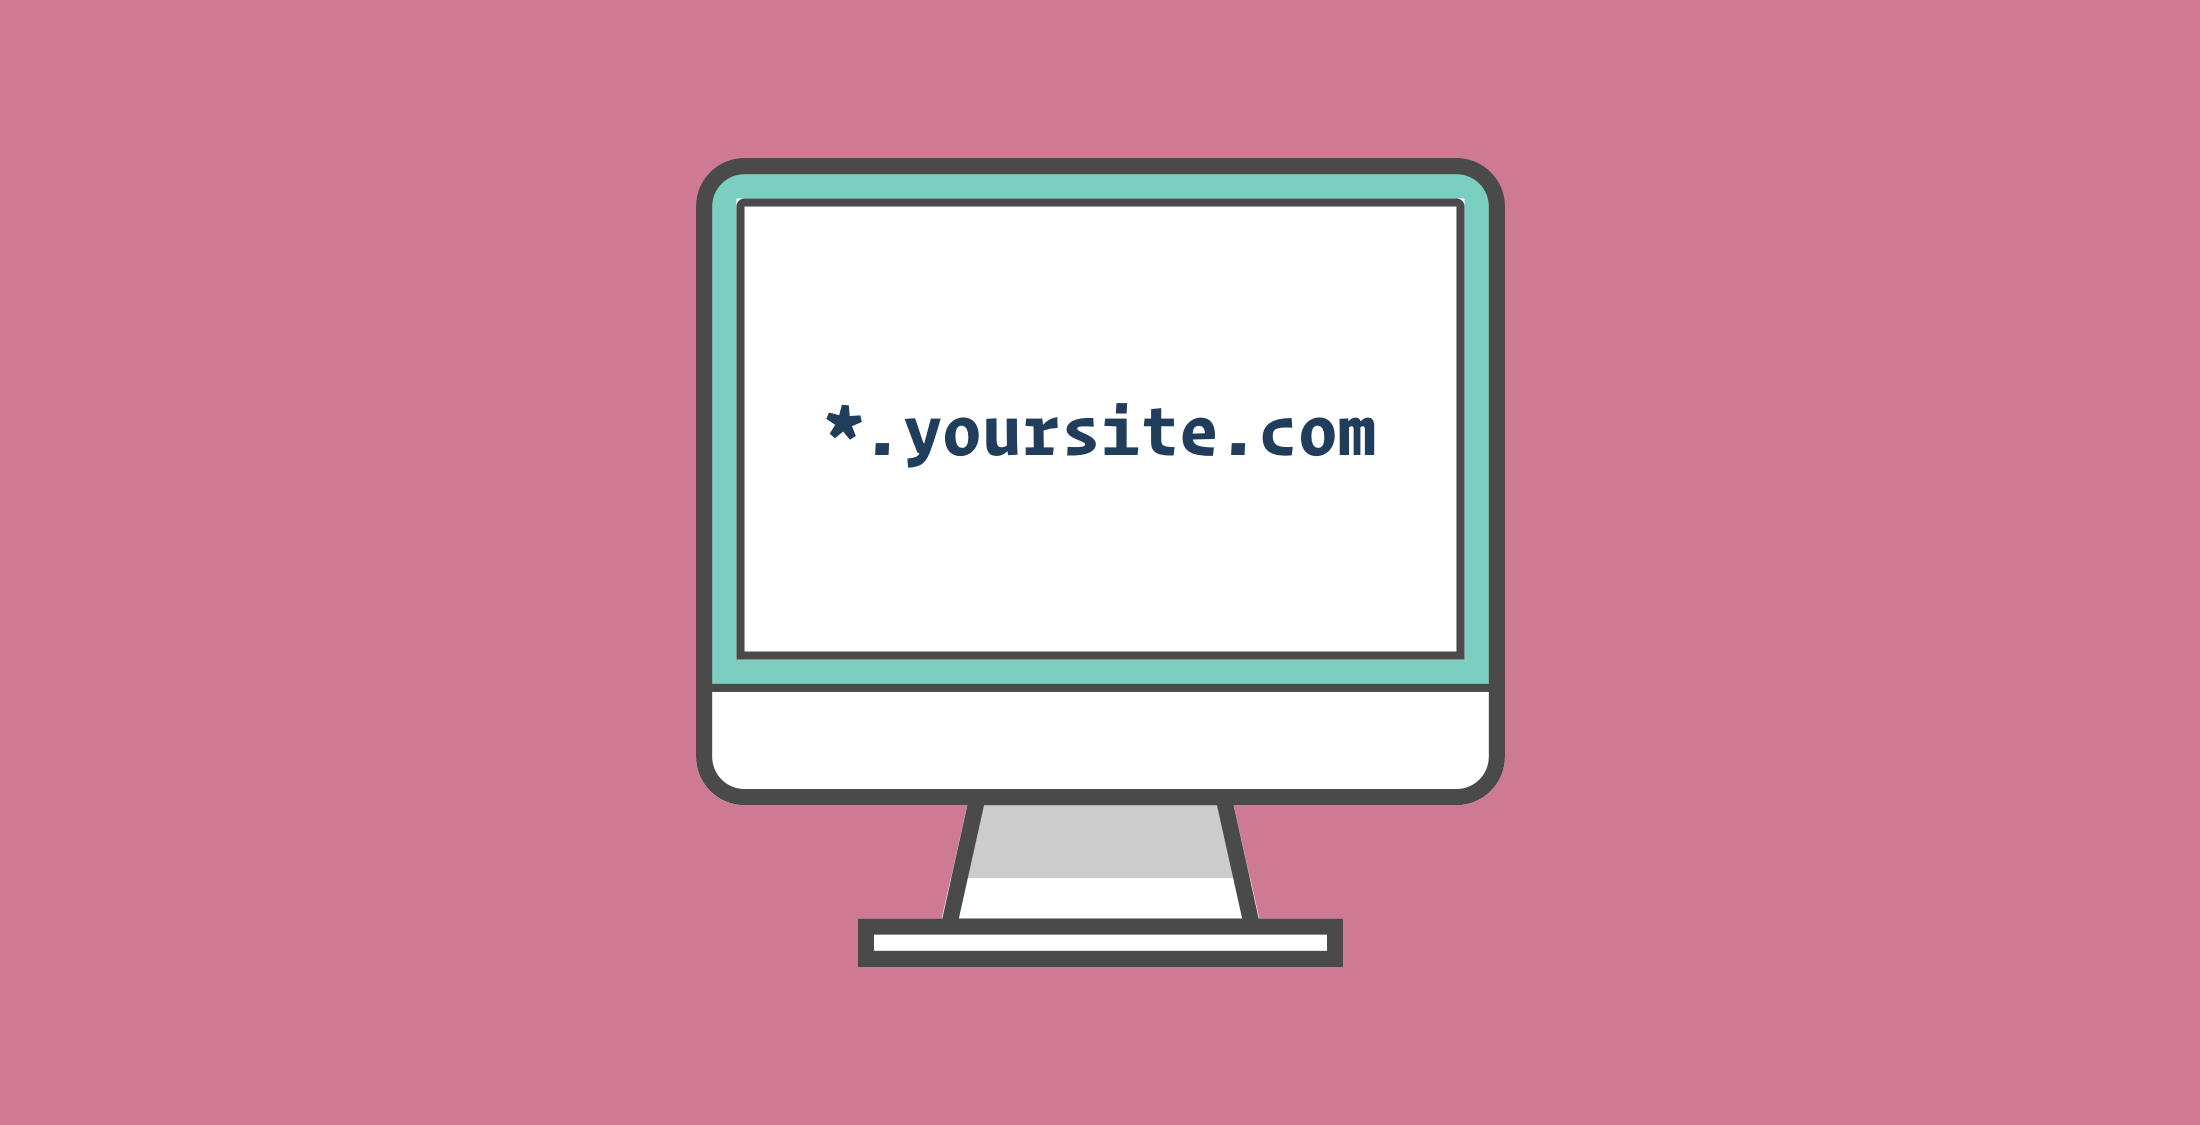
A wildcard SSL certificate can be used to enable HTTPS for all subdomains of a given domain. A wildcard certificate for *.example.com would provide HTTPS for every subdomain such as blog.example.com, any.example.com, or shop.example.com, using a single certificate as opposed to individual certificates for each subdomain. This is super useful for applications that have custom subdomains for its users such as Slack or WordPress. Non-wildcard certificates are still recommended for most use cases.
Prepping a Site for a Wildcard Certificate
In this tutorial, we'll simulate the deployment of a multi-tenant social networking application where each subdomain represents a user.
Before starting this tutorial, I assume that you have:
- A fully registered domain. The tutorial will use
example.com, so replace that with your own domain - An Ubuntu 16.04 server with sudo access
- NGINX installed
Configure domain DNS records
Depending on your domain provider or host, this process might be slightly different.
- Go to the DNS Manager on your domain provider or host.
- Create an
A/AAAA Recordfor your domain with the following details:- Host name/name:
*\*.\*example.com - Value/address:
your_server_ip_address
- Host name/name:
- Set the Time To Live (TTL) to as low as possible in order to increase speed of propagation.
Configure NGINX to serve an HTML file
Install NGINX if you haven't already.
LANG:bash
sudo apt-get update
sudo apt-get install nginx
Create an index.html file with the content below at /var/www/html on the server.
LANG:js
<!DOCTYPE html>
<html lang="en">
<head>
  <meta charset="UTF-8">
  <meta name="viewport" content="width=device-width, initial-scale=1.0">
  <meta http-equiv="X-UA-Compatible" content="ie=edge">
  <title>Test Application</title>
</head>
<body>
  <h2 id="intro"></h2>
</body>
<script>
  let getUser = () => {
    var full = window.location.host
    var parts = full.split('.')
    var sub = parts[0]
    return sub.charAt(0).toUpperCase() + sub.slice(1).toLowerCase();
  }
  document.getElementById('intro').innerHTML = `Hi, ${getUser()}`
</script>
</html>
Open the default NGINX default configuration.
LANG:bash
sudo nano /etc/nginx/sites-available/default
Replace its content with the following server block in order to serve the static HTML file we created earlier. Put your domain name in place of example.com.
LANG:code
server {
  server_name *.example.com;
  root /var/www/html;
  index index.html;
  location / {
    try_files $uri $uri/ =404;
  }
}
Test config and restart NGINX using these commands:
LANG:bash
sudo nginx -t
sudo service nginx restart
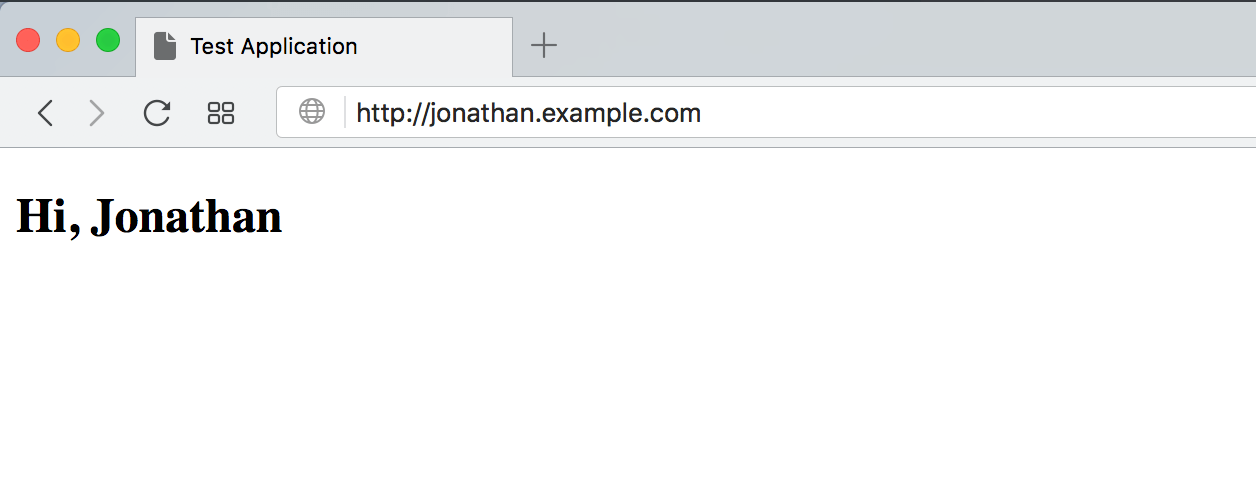
Visit http://{name}.example.com to view the unsecure version of the site, which should look something like this:
Secure the Site with Let's Encrypt Wildcard SSL Certificate
Now that we have NGINX configured, let's make our site secure with Let's Encrypt.
Install Certbot
In order to use Let's Encrypt certificates, we have to install the certbot software.
Add the PPA:
LANG:bash
sudo add-apt-repository ppa:certbot/certbot
Hit Enter when asked to confirm addition. Then update and install Certbot's NGINX software.
LANG:bash
sudo apt-get update
sudo apt-get install python-certbot-nginx
Obtain a Let's Encrypt certificate
Cerbot provides the NGINX config to help us reconfigure our previous NGINX config so we can use the SSL certificates we are about to obtain.
At the time of writing, only manual authentication using a DNS challenge is possible for wildcard certificates.
Run the command below to start the process of getting the certificate:
LANG:bash
sudo certbot --server https://acme-v02.api.letsencrypt.org/directory --manual --preferred-challenges dns  --installer nginx -d *.example.com
You'll be prompted to enter your email address for urgent renewal and security notices. Read and agree to the terms and conditions and answer (Y)es to the subsequent questions.
DNS challenge
After agreeing to Let's Encrypt's terms, you'll be presented with a value that you should insert as a TXT record for the domain you're verifying.
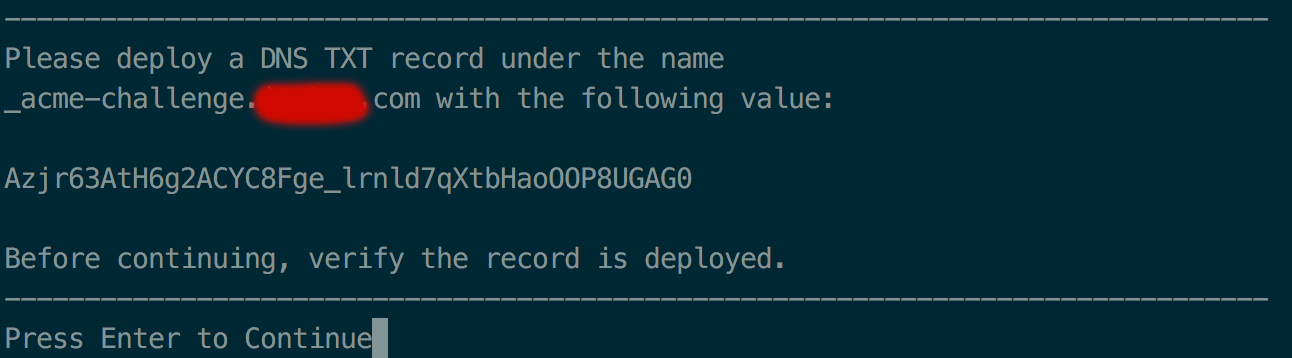
Go to your domain name's DNS manager and create a TXT record with the name as displayed on your terminal and with the value also displayed. Set the TTL value as low as possible and save the record.
Make sure the record has been deployed by verifying with TXT Lookup, using the name _acme-challenge.example.com provided by Let's Encrypt before hitting Enter.

Deploy certificate
Once the challenge has been verified, a list of server blocks in your nginx configuration would be presented for you to select the ones to deploy the certificate to. Based on our current configuration, select 1 or leave blank to select all. Hit [ENTER] to proceed.
Redirect HTTP to HTTPS
Choose whether to redirect HTTP traffic to HTTPS, which is recommended. You'll be provided with the same list from the previous stage, select the same option as before. Hit Enter to proceed.
Visit https://{any}.example.com to test the application. If you selected the redirect option, the unsecure version is automatically redirected to the secure version.
Conclusion
The security of web applications should be a major concern to every developer, and one of the very first steps is to make sure data transfer between users and your web application is secure. As explained in this post, wildcard SSL certificates are a great solution when you need to deploy HTTPS on multiple subdomains without having to request a different certificate for each subdomain.


