


Jenkins jobs are the basic building blocks in your continuous integration/continuous deployment (CI/CD) pipelines. You create jobs to build, test, package, and deploy your code, then mix and match them in pipelines to adapt to different requirements and situations.
Your CI/CD pipelines consist of Jenkins jobs, but that doesn’t mean the jobs are small, easy to create, or simple to maintain. The jobs have many moving parts, and building them from scratch can be time-consuming and error-prone. It’s easier to create basic job templates and copy, or “clone,” them when necessary than it is to create new ones from scratch.
In this post, we’ll look at different types of Jenkins jobs, explore how to clone them, and discuss a few situations where cloning jobs will make your life easier.
Let’s get started!
Jenkins Jobs
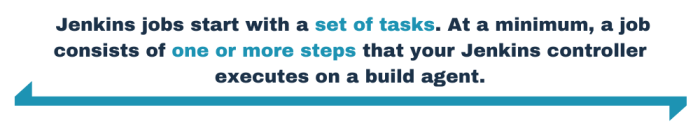
Jenkins jobs start with a set of tasks. At a minimum, a job consists of one or more steps that your Jenkins controller executes on a build agent. In addition, you can associate a job with a source control repository. So, a job can check out source code and other artifacts from the repository, run a build, deploy the created artifact, and report on the results.
The Pipeline job type also allows you to check out files from a repository that contains the steps to be executed in the job. You write these jobs in Jenkins’ Domain Specific Language (DSL), which is based on Apache Groovy.
Jobs are also associated with settings that will trigger them. You can always initiate a job manually from the Jenkins webpage. But you can configure them with a schedule, have them run in response to source control changes, or run after another job completes.
Let’s look at the different types of Jenkins jobs.
Jenkins Job Types
When you create a new item, Jenkins presents you with six options:
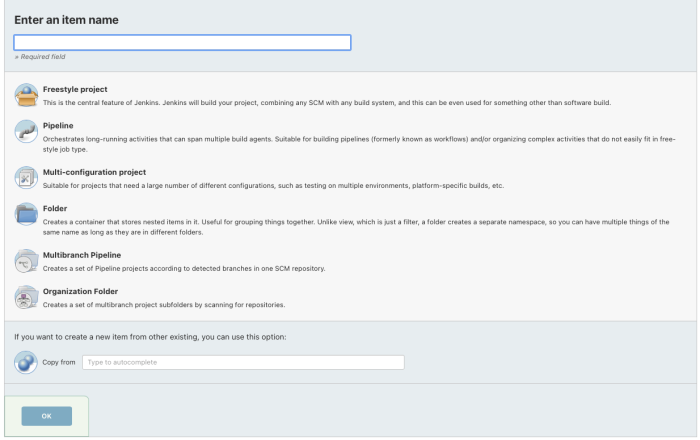
There are four job types and two folder types. Folders are for grouping jobs, so we won’t cover them here.
A Freestyle project can do nearly anything:

Since a Freestyle job can execute Windows batch or Linux shell commands, it can truly perform any task you make available to a build agent.
Freestyle jobs also have the ability to run build tools like Ant, Gradle, and Maven, just to name a few. Some of these abilities are provided via plugins that add capabilities to your Jenkins controller and agents.
Pipeline jobs run Jenkins Pipeline scripts. Jenkins can run the scripts directly from source control, or you can enter them directly into the job configuration page.
Like Freestyle jobs, Pipeline jobs can execute a wide variety of tasks, such as executing build tools, creating and running Docker containers, or calling shell scripts. They can also call other Jenkins jobs. Pipeline scripts are typically defined in a file named Jenkinsfile and stored in a source control repository with the project’s source code. But for small jobs or jobs that simply run other projects, you can enter the script directly into the job configuration.
With Multi-configuration projects, you create a configuration option matrix that correlates project steps with configurations. For example, if you need to run debug, patch, and release Maven builds from the same source code repository and deploy the result to the same location, a Multi-configuration job might be the best option.
Multibranch Pipelines are Pipeline jobs that support multiple branches from a source control repository. By default, these jobs save you a lot of work because they automatically create Pipeline jobs for each branch that has a Jenkinsfile.
Clone a Jenkins Job
So let’s look at how easy it is to clone a Jenkins job.
First, we need a job to clone. Let’s add a Pipeline job that retrieves and runs a Jenkinsfile from GitHub.
Add a Jenkins Job
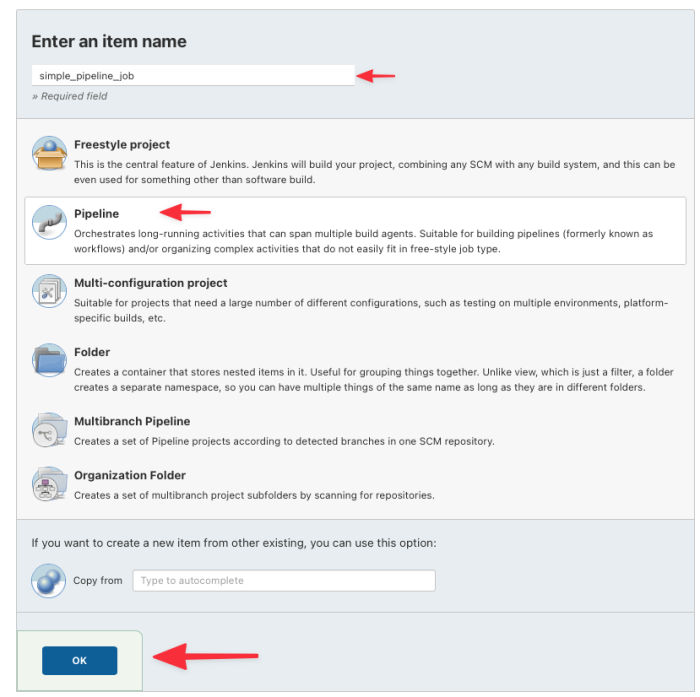
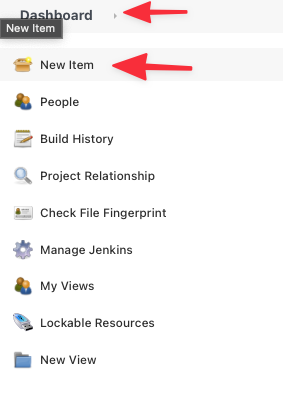
Start by clicking New Item in the Jenkins menu.

This takes you to the new item form we looked at above.
Give your project a name, select Pipeline for the item type, and click OK.
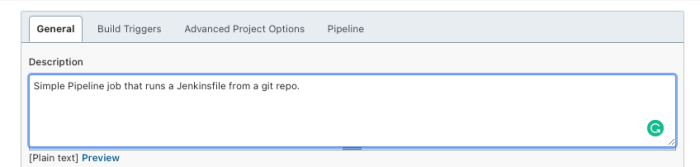
Jenkins takes you to the job configuration page.
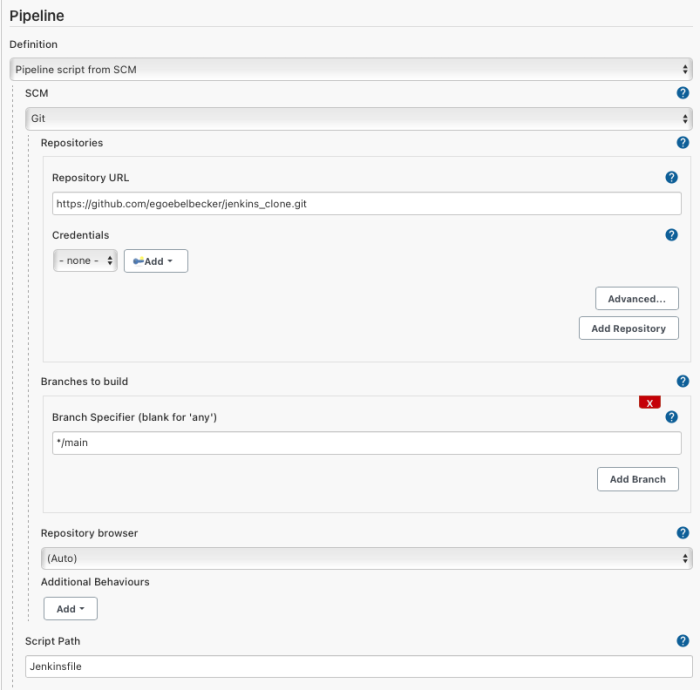
Click on the Pipeline tab to scroll the window down to the Pipeline settings.
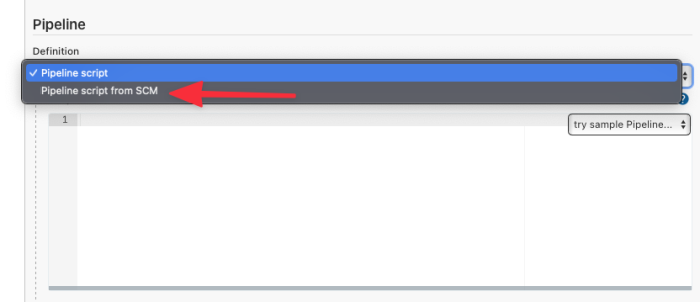
Select Pipeline script from SCM under Definition.
This adds several new options to the Pipeline configuration area.
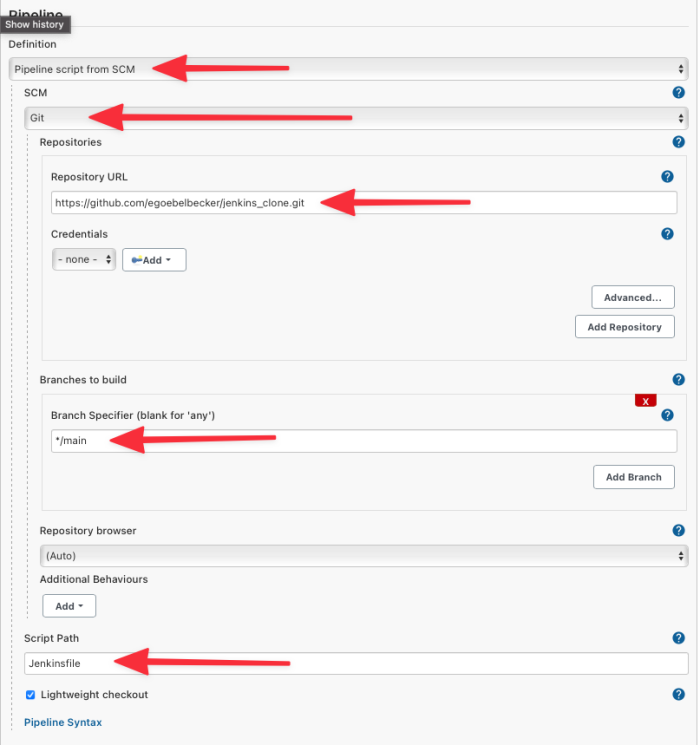
After you select Pipeline script from SCM, Jenkins will offer the SCM setting. Select Git.
Next, Jenkins will offer you a Repository URL setting. Paste in your GitHub URL. I’m using https://github.com/egoebelbecker/jenkins_clone.git, which is a public repo.
Since this is a public repo and the job isn’t going to push changes, we don’t need to specify Credentials for the repository.
Next, set the Branch Specifier to */main. The Jenkins default, */master, is no longer the default in GitHub.
Finally, verify that the Script Path is Jenkinsfile. This tells Jenkins to look for the file named "Jenkinsfile" in the root of the project.
Click Save at the bottom of the page. The new job is configured and ready for testing.
Testing the New Job
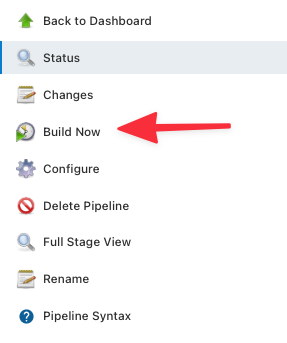
Click Build Now in the project menu.
Jenkins will retrieve the repository from GitHub, load the Jenkinsfile, and run the job.
Here are the Jenkinsfile contents.
pipeline { agent any stages { stage('Do Things') { steps { sh 'echo w00t!' } } }}
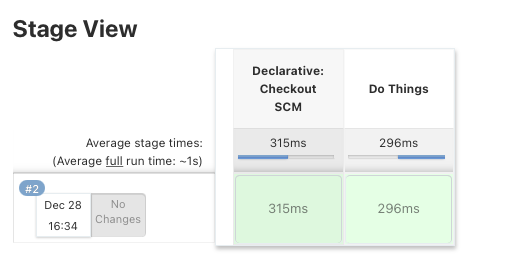
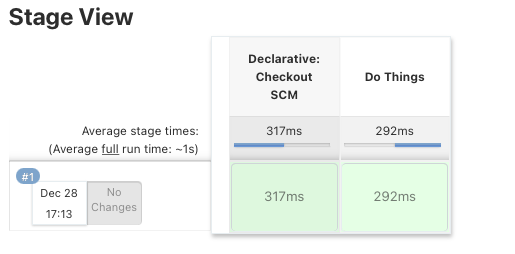
This job has a single stage named “Do Things” that echoes some text to the console.
After it’s run successfully, you can see the results. As an example, take a look at the screenshot below. There’s a column for checking out the code and another for running the Do Things stage. Green means the stage succeeded.
Let’s take a look at the console output.
Click on the build number and select Console Output from the dropdown menu.
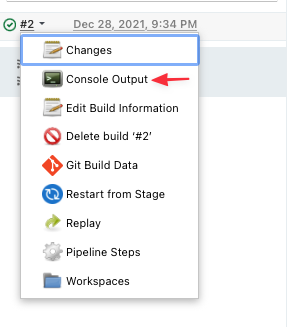
The top of the log has the Git checkout information. Toward the bottom, the lines that begin with [Pipeline] show the build steps.
[Pipeline] stage[Pipeline] { (Do Things)[Pipeline] sh+ echo w00t!w00t![Pipeline] }[Pipeline] // stage[Pipeline] }[Pipeline] // withEnv[Pipeline] }[Pipeline] // node[Pipeline] End of PipelineFinished: SUCCESS
The log shows the stage and the output sent to the console.
Now, let’s clone this job.
Clone the Job
First, we need to go back to the Jenkins Dashboard. You can do that from anywhere by clicking on the Dashboard entry in the navigation menu.
Then click on New Item again.
We’re back at the familiar New Item page.
This time, enter a name for your new job. But instead of specifying an item type, enter the name of the job you want to make a clone of in the Copy from box.
Jenkins has an autocomplete function, so you only need to type a few characters before you get a selection to choose from.
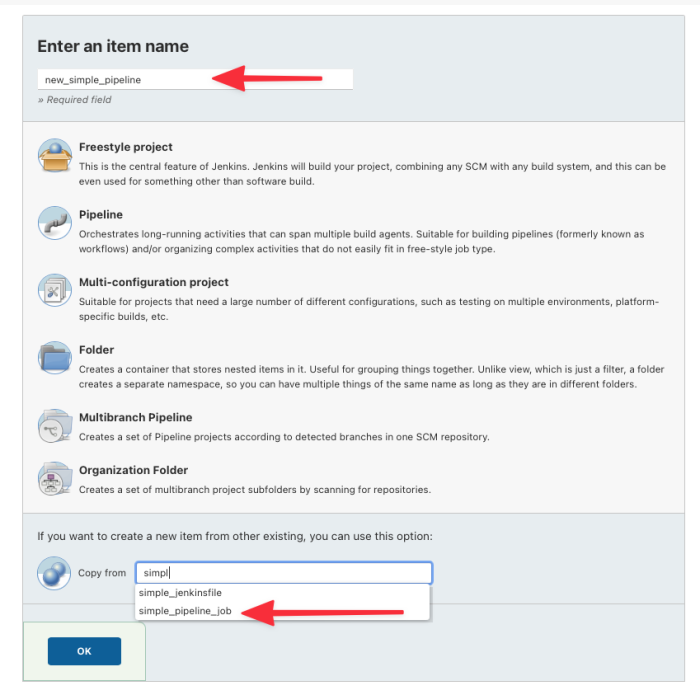
Select the job and click OK.
Jenkins takes you to the job configuration page, but the job is already configured.
Save the job and run it.
We see the same result as the original job!
Cloning the job gave us an exact copy of the original job with a different name and an empty description.
Why Clone a Jenkins Job?
We cloned a simple job that only had some GitHub configuration information associated with it. It saved us a few minutes, but cloning more complicated jobs can save you a great deal more time and effort while avoiding errors from typos and other mistakes.
Let’s take a look at Jenkins trigger options.
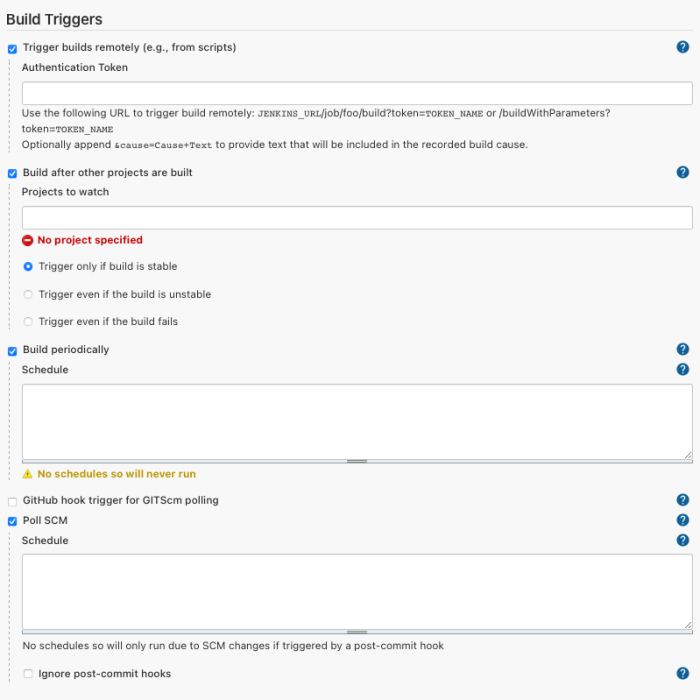
Jobs can be triggered remotely by a script that presents a token. Or, you can start them with the completion of one or more other jobs.
You can set up jobs with schedules for running or polling your source control repository. Jenkins schedules use a format that can be difficult to understand since they are a variant of the Unix cron syntax.
All of these options require configuration. If you needed to duplicate some or all of it to a new job, you would have to copy and paste or enter it manually. This can lead to errors.
When you clone a job, Jenkins copies the entire configuration. So, cloning saves you the trouble of re-entering the configuration information by hand.
Take Advantage of Cloning Jenkins Jobs
In this post, we covered some different Jenkins job types and what they are capable of doing for you. Then we created a simple Pipeline job and tested it.
After verifying that the new job worked, we cloned it and tested the new copy to verify that Jenkins copied the configuration.
Finally, we looked at some use cases for cloning Jenkins jobs. We saw that project configurations can get complicated and how cloning a job saves time and avoids errors.
Jenkins’ ability to copy existing jobs will save you time and help you build powerful CI/CD pipelines. Give it a try today!
This post was written by Eric Goebelbecker. Eric has worked in the financial markets in New York City for 25 years, developing infrastructure for market data and financial information exchange (FIX) protocol networks. He loves to talk about what makes teams effective (or not so effective!).


