

Over the years, software has grown in size and complexity. As the number of lines in our code grows, the quality of the code being written usually suffers. Code is often copied and pasted across modules, or you have that one developer who keeps "forgetting" to follow the agreed-upon syntax when it comes to naming member variables we all discussed in that one meeting years ago. Ensuring that a codebase is following certain quality guidelines isn't a new topic. Analyzing source code for syntax or quality issues is often referred to as linting, coined by the computer scientist Stephen C. Jones back in 1978 while porting Unix to a 32-bit machine. While modern compilers do a really good job of catching some of the errors that linting tools will find, these tools have evolved to keep up with the times. Among the leading tools out there is SonarQube from SonarSource. It's been a major player in the open-source and commercial space, and it's been around for quite a while.

This article takes a look at integrating with the SonarLint IntelliJ plugin for analyzing code while it's being worked on, as well as integrating with SonarQube through the SonarCloud offering for analyzing and tracking quality issues across all of your organization's projects. Using tools like these will help preserve the quality of the code being developed. Thus, it reduces the cost of ongoing development as well as the cost associated with maintenance. Simple and straightforward code makes everything easier.
Create a Simple Project
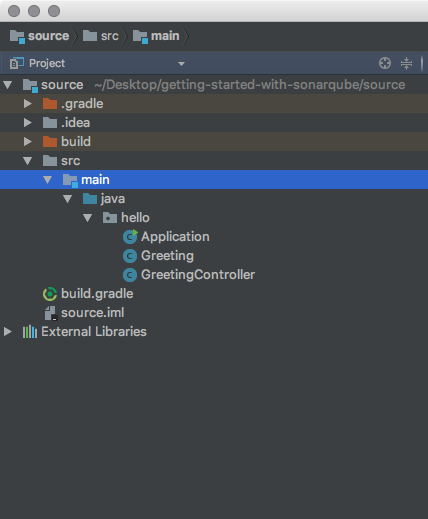
Before diving into using SonarLint and SonarQube, we need a project to work with. For this guide, we'll use the restful Java web service from the Building a RESTful Web Service Spring guide project, and we'll use Gradle as a build tool. We'll also take the SonarLint IntelliJ plugin for a spin, so be sure to download the community edition of IntelliJ. If you have an existing project that you'd like to use instead, by all means use that. Either way, go ahead and take a few minutes to get the project running using your preferred build environment and import it into IntelliJ. Once you have everything imported, your project window should look something like the following:
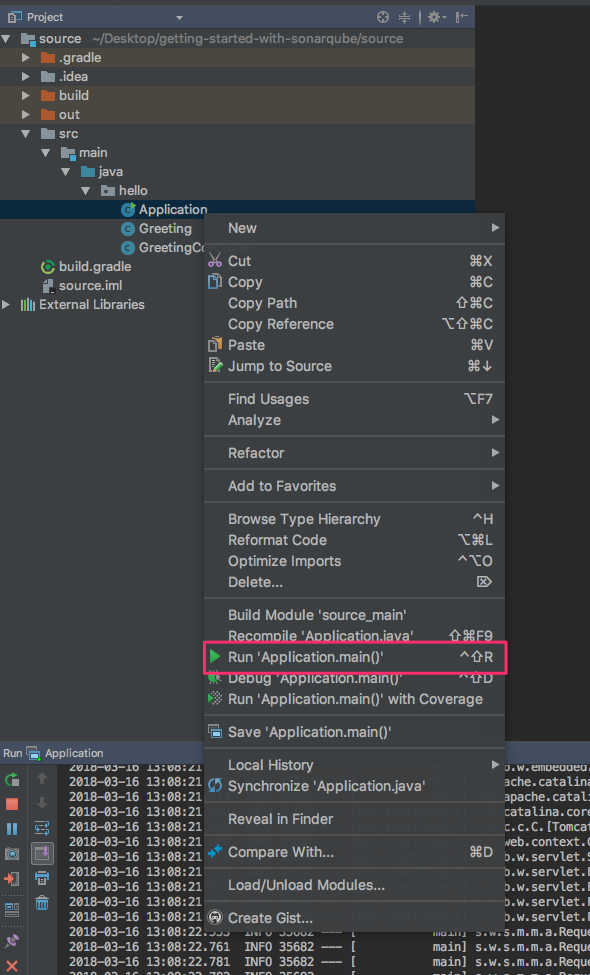
Verify that everything is working by right-clicking the Application.java file in IntelliJ and click "Run."
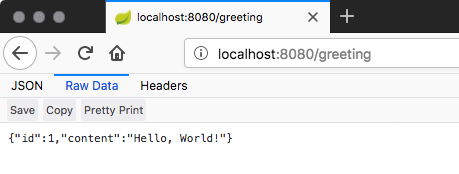
After running it, test that everything is working OK by navigating to http://localhost:8080/greeting in your browser. You should see the venerable "Hello, World!" message formatted as a JSON object:
If not, go back and ensure that you have a working project before continuing.
Take SonarLint for a Spin
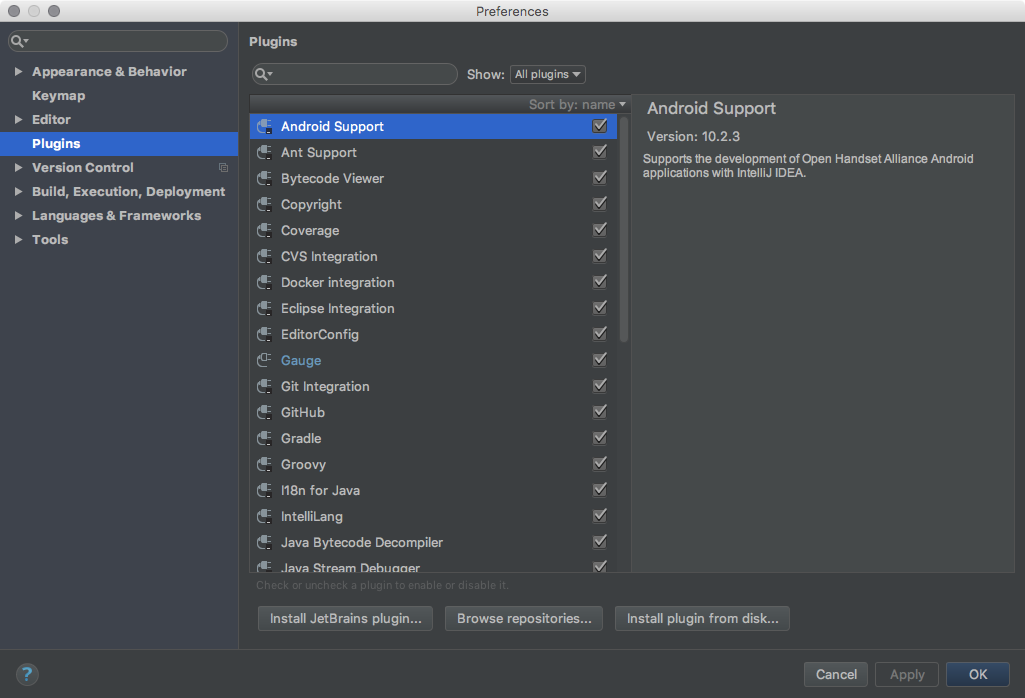
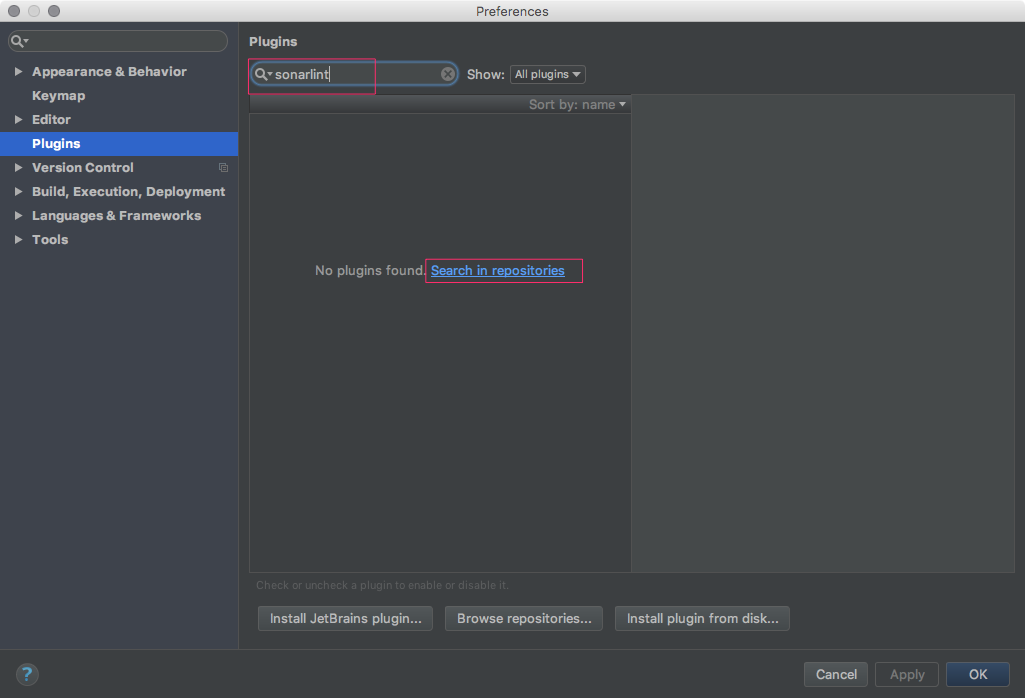
Now that we have our project set up and ready to go, we need to install the SonarLint plugin. First, open the IntelliJ "Preferences" window and select the "Plugins" selection on the left.
The easiest way to find the SonarLint plugin is to just search for it. Do this by entering "SonarLint" as a search term and then click the "Search in repositories" link.
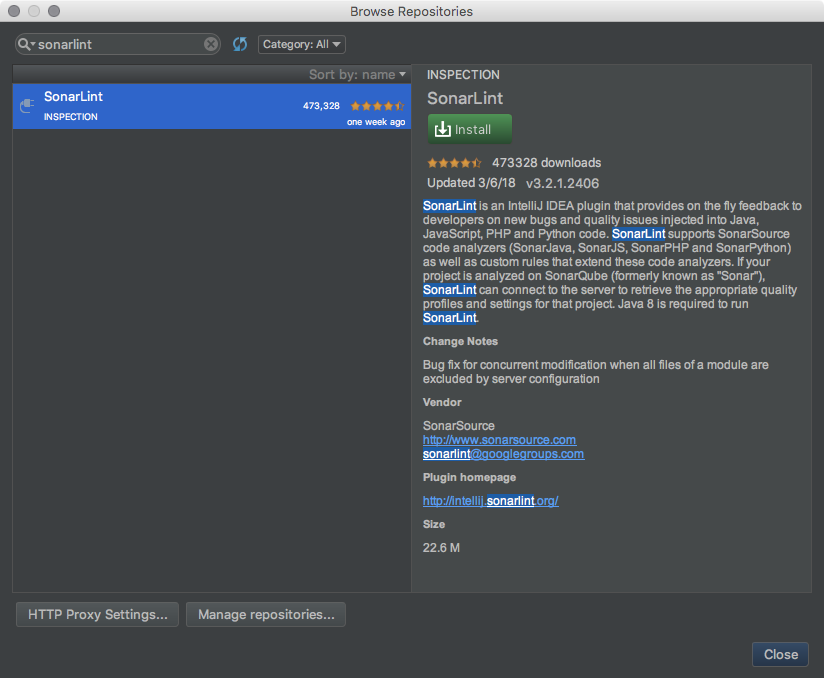
This should find the SonarLint inspection plugin pretty quickly from the Sonar plugin repository. Go ahead and click the green "Install" button, and the installation process will start. Once it finishes, restart IntelliJ.
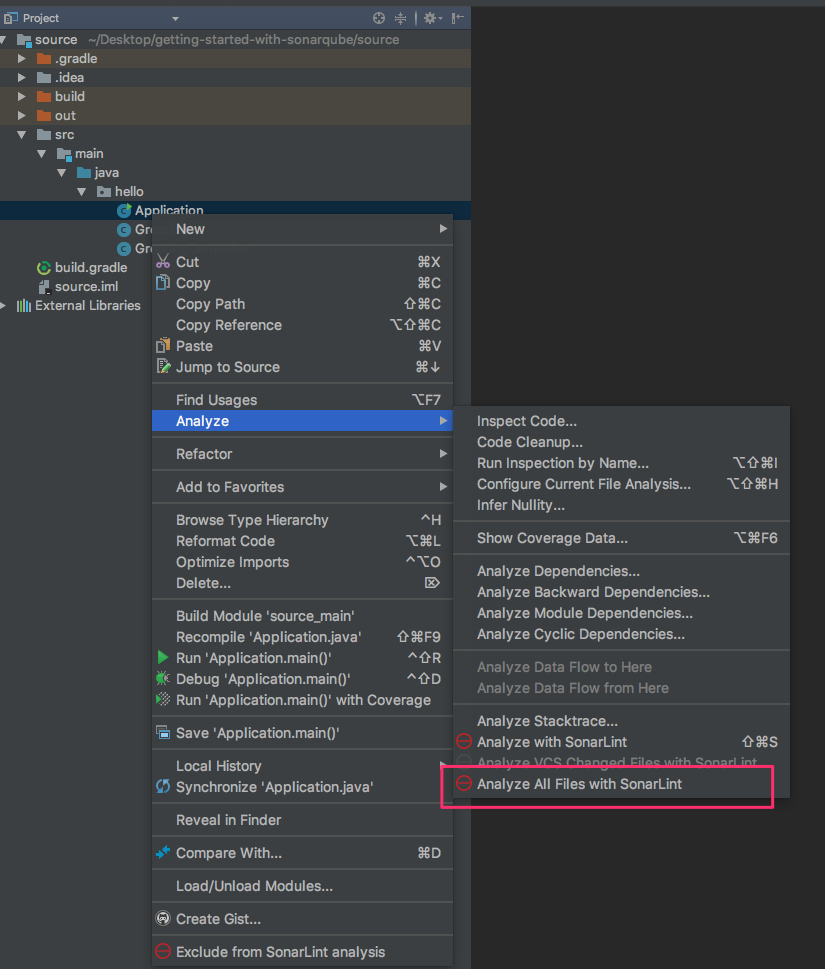
Now we're ready to put our plugin to work. Right-click on any project file in our project window to open the context menu. From the "Analyze" submenu all the way at the bottom, select the "Analyze all files with SonarLint" option.
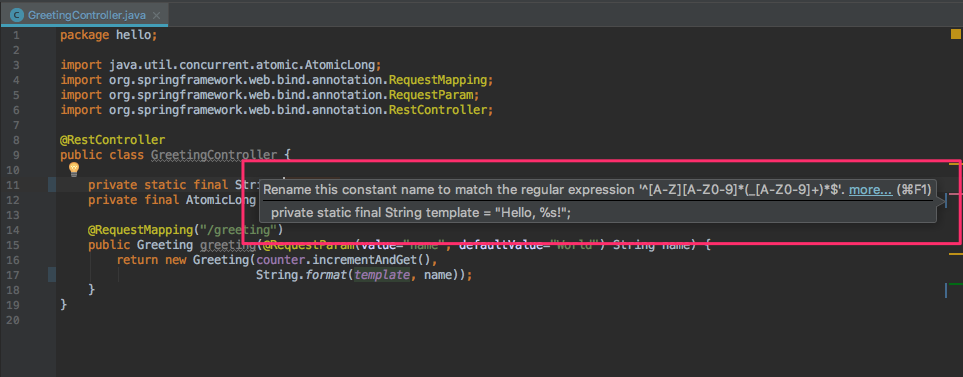
If you see a warning that this may take a while for large projects, just click through to proceed and the SonarLint analysis will start to run. A new window will appear at the bottom of the IDE after the analysis is done. This window shows all of the findings. Currently, in our project, there's only a single finding. Click on the finding to reveal more information about it and to see examples of non-compliant code and compliant code.

Double-clicking a finding will take us to the file and line where the issue is.
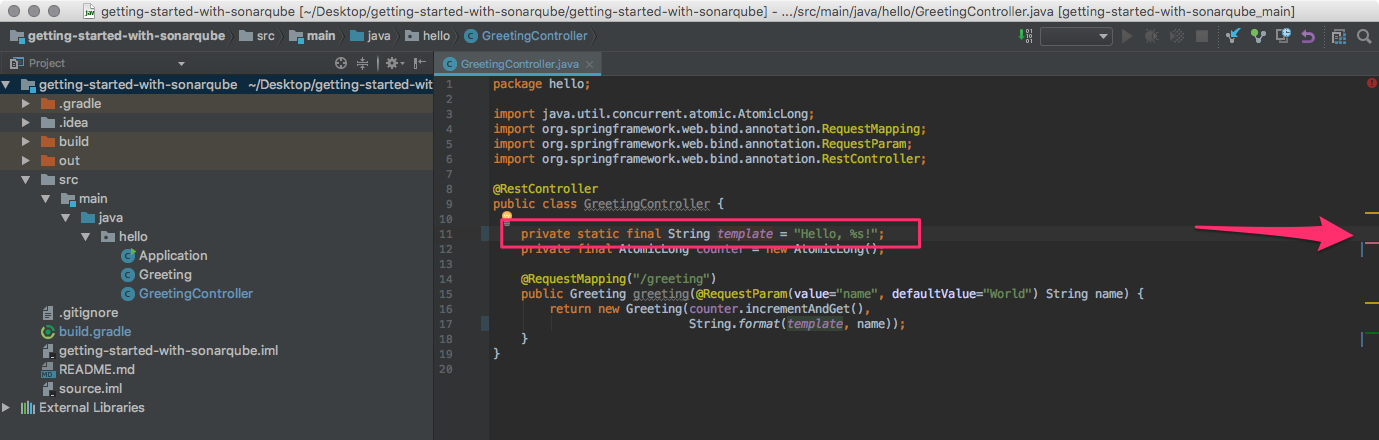
The SonarLint plugin will also provide real-time feedback during development just like any of the other IntelliJ inspections. The additional inspections will appear on the right-hand side of the code editor window where all the other IntelliJ inspections appear. Hovering over one of the markers will give you a brief synopsis of the issue.
Now we have a way of receiving immediate feedback on potential issues while the code is under development. I know you want to fix the issue (what good developer wouldn't?), but let's leave it for now so we'll have something to look at using the SonarQube cloud service.
Integrate With SonarQube Using SonarCloud
SonarCloud is a hosted cloud service that makes it easy to use SonarQube in a team environment without needing to run our own SonarQube instance. Integrating with SonarCloud is a multi-step process, but it's easy enough and straightforward. It boils down to registering for the free service, grabbing the organization name, and generating an authentication token. Once we have these, we need to update our Gradle build file with the SonarQube plugin. The plugin will allow us to kick off a scan of the project using SonarCloud, with the results available to us in our SonarCloud dashboard. We, along with other members of the project, can dig into these results. First, open the following SonarCloud "Get Started" page to follow along:
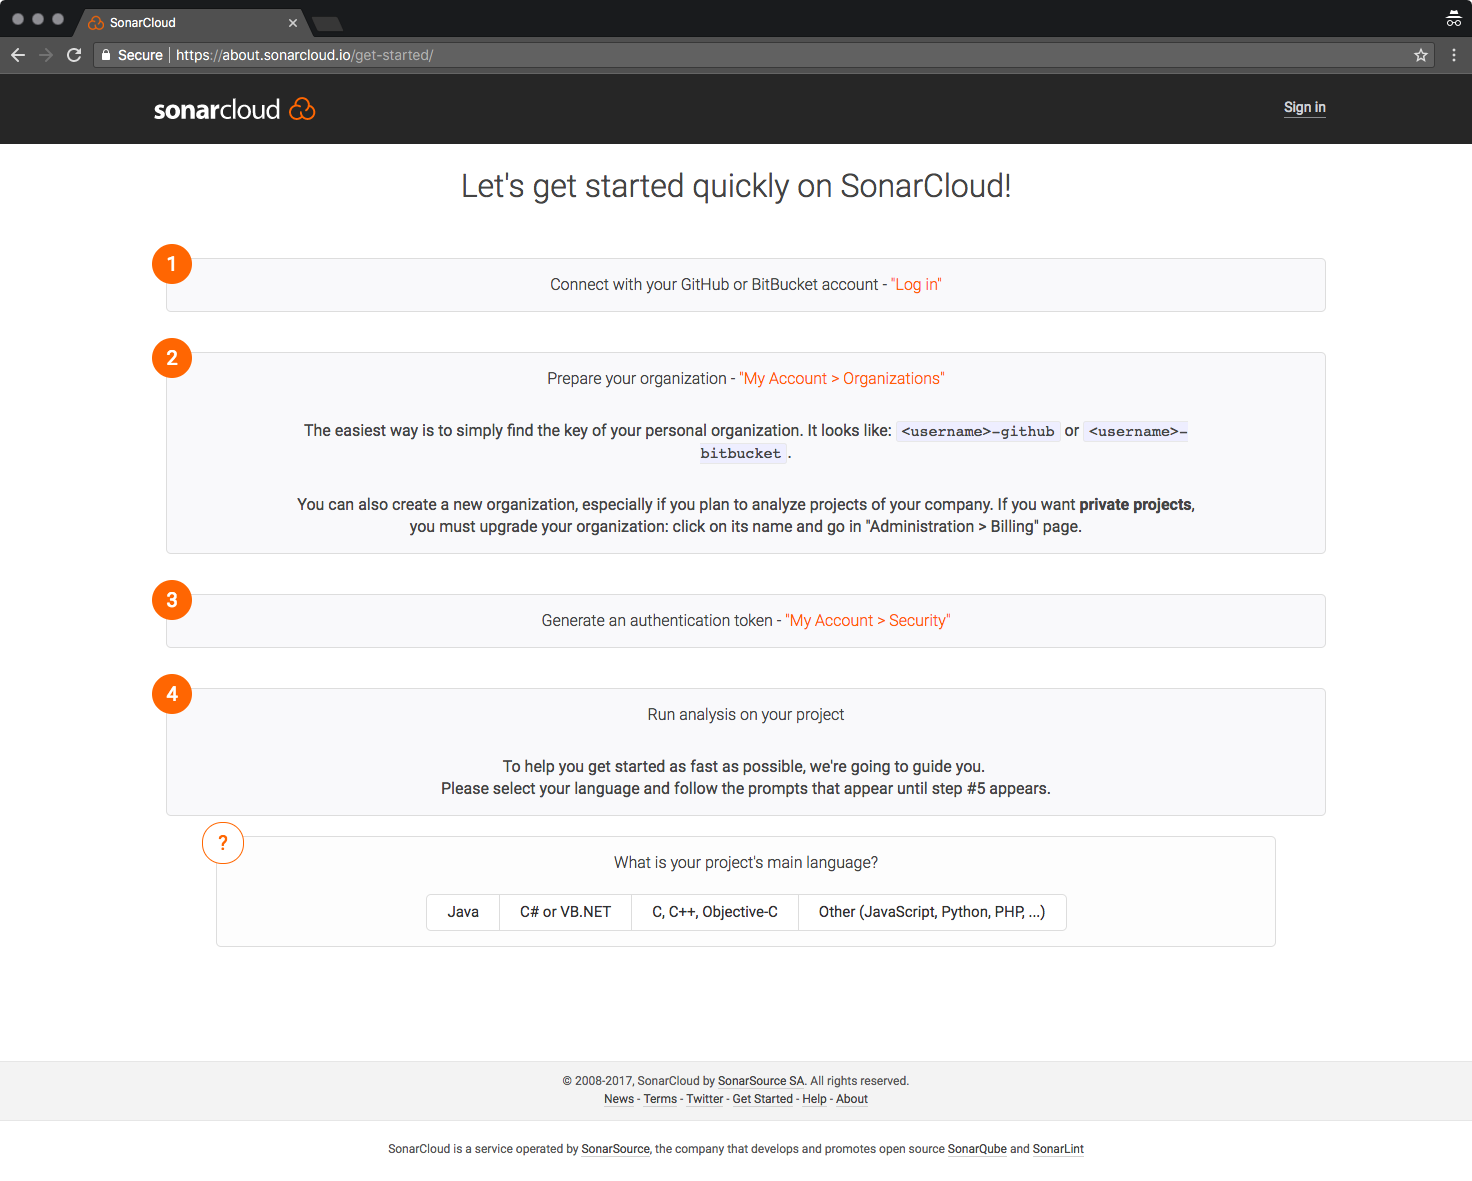
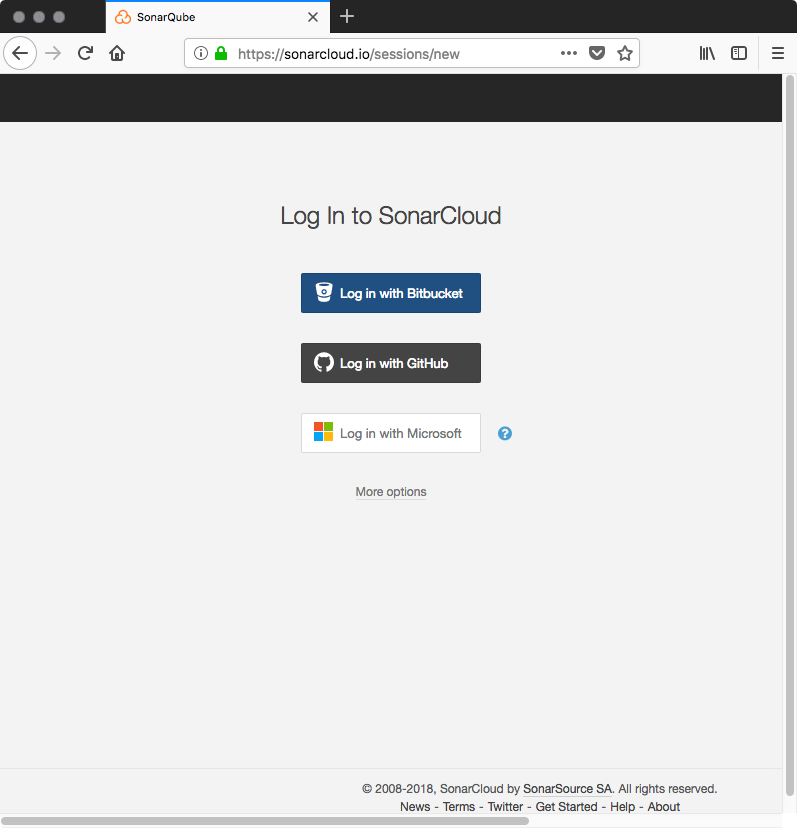
The first step is to connect to a GitHub or Bitbucket account. I'll be using my GitHub account for this, so go ahead and log in.
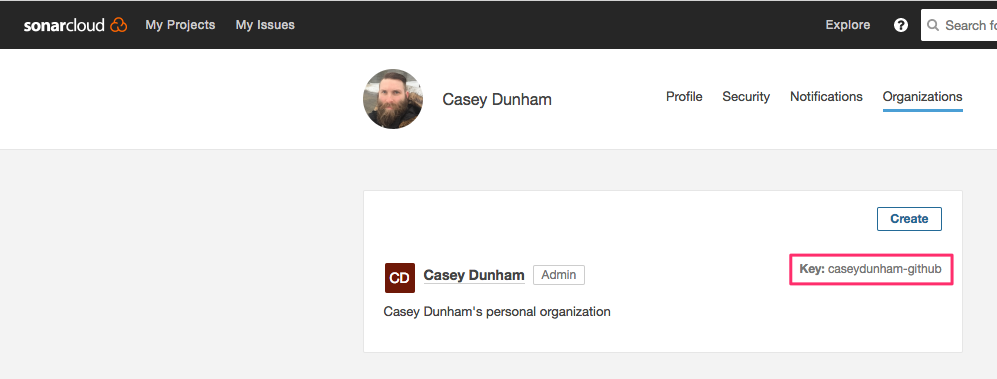
Next, we need our organization key, which can be found under the "Organizations" section. Here, mine is caseydunham-github.
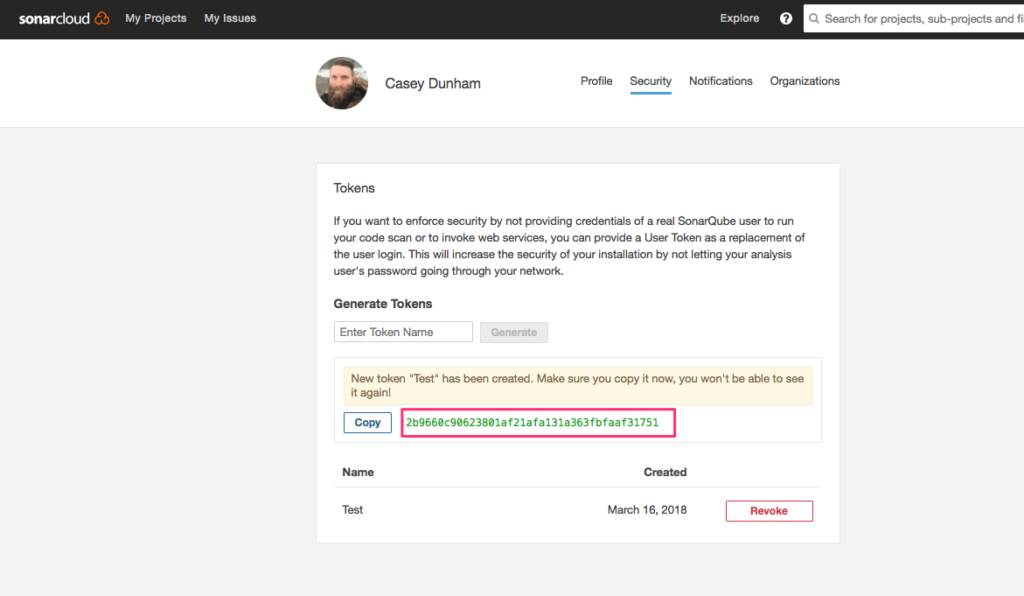
Now we'll create an authentication token to use from our build command. Navigate to your "Account Security" page and enter a name for the token. Then, click the "Generate Token" button. After you name and create the token, copy it since you can't retrieve the token again later. If you lose it, you will need to revoke it and generate a new one.
Alright, we now have information we need to run the SonarCloud build plugin. First, though, we have to add the plugin to our build file. Open up build.gradle. It should look like this:
LANG:code
buildscript {
    repositories {
        mavenCentral()
    }
    dependencies {
        classpath("org.springframework.boot:spring-boot-gradle-plugin:2.0.0.RELEASE")
    }
}

plugins {
  id "org.sonarqube" version "2.6.1"
}

apply plugin: 'java'
apply plugin: 'eclipse'
apply plugin: 'idea'
apply plugin: 'org.springframework.boot'
apply plugin: 'io.spring.dependency-management'

bootJar {
    baseName = 'gs-rest-service'
    version =  '0.1.0'
}

repositories {
    mavenCentral()
}

sourceCompatibility = 1.8
targetCompatibility = 1.8

dependencies {
    compile("org.springframework.boot:spring-boot-starter-web")
    testCompile('org.springframework.boot:spring-boot-starter-test')
}
Add the following plugin definition to your Gradle build file after the buildscript section.
LANG:code
plugins {
  id "org.sonarqube" version "2.6.1"
}
Your updated build.gradle file should look like the following:
LANG:code
buildscript {
    repositories {
        mavenCentral()
    }
    dependencies {
        classpath("org.springframework.boot:spring-boot-gradle-plugin:2.0.0.RELEASE")
    }
}

plugins {
  id "org.sonarqube" version "2.6.1"
}

apply plugin: 'java'
apply plugin: 'eclipse'
apply plugin: 'idea'
apply plugin: 'org.springframework.boot'
apply plugin: 'io.spring.dependency-management'


bootJar {
    baseName = 'gs-rest-service'
    version =  '0.1.0'
}

repositories {
    mavenCentral()
}

sourceCompatibility = 1.8
targetCompatibility = 1.8

dependencies {
    compile("org.springframework.boot:spring-boot-starter-web")
    testCompile('org.springframework.boot:spring-boot-starter-test')
}
To run the SonarQube plugin using Gradle, the command will be this:
LANG:code
gradle sonarqube
       -Dsonar.host.url=https://sonarcloud.io
       -Dsonar.organization=your_organization_key
       -Dsonar.login=abcdef0123456789
Replace your_organization_key and the sonar.login token with the values you retrieved earlier. By updating with our organization information, the command becomes the following:
LANG:code
gradle sonarqube
       -Dsonar.host.url=https://sonarcloud.io
       -Dsonar.organization=caseydunham-github
       -Dsonar.login=2b9660c90623801af21afa131a363fbfaaf31751
We can now run this from a command line to kick off our first analysis.
LANG:code
$ gradle sonarqube
>        -Dsonar.host.url=https://sonarcloud.io
>        -Dsonar.organization=caseydunham-github
>        -Dsonar.login=2b9660c90623801af21afa131a363fbfaaf31751

> Task :sonarqube
Classes not found during the analysis : [javax.annotation.meta.When]


BUILD SUCCESSFUL in 17s
2 actionable tasks: 2 executed
Read on to see what happens next!
Dig Into the Findings
After the Gradle command finishes, return to the SonarCloud dashboard. This dashboard is divided into two sections. The left side has a variety of filters that we can use to view our projects, which is extremely handy when the project list grows in size. The right-hand side of the dashboard shows a quick view of the projects that our user can see. The quick view shows information about whether the project has passed the quality gate and what types of issues were found, along with coverage and duplication statistics. This is a one-stop view for determining the health of a project.

Click the project name to see more detail about our findings.
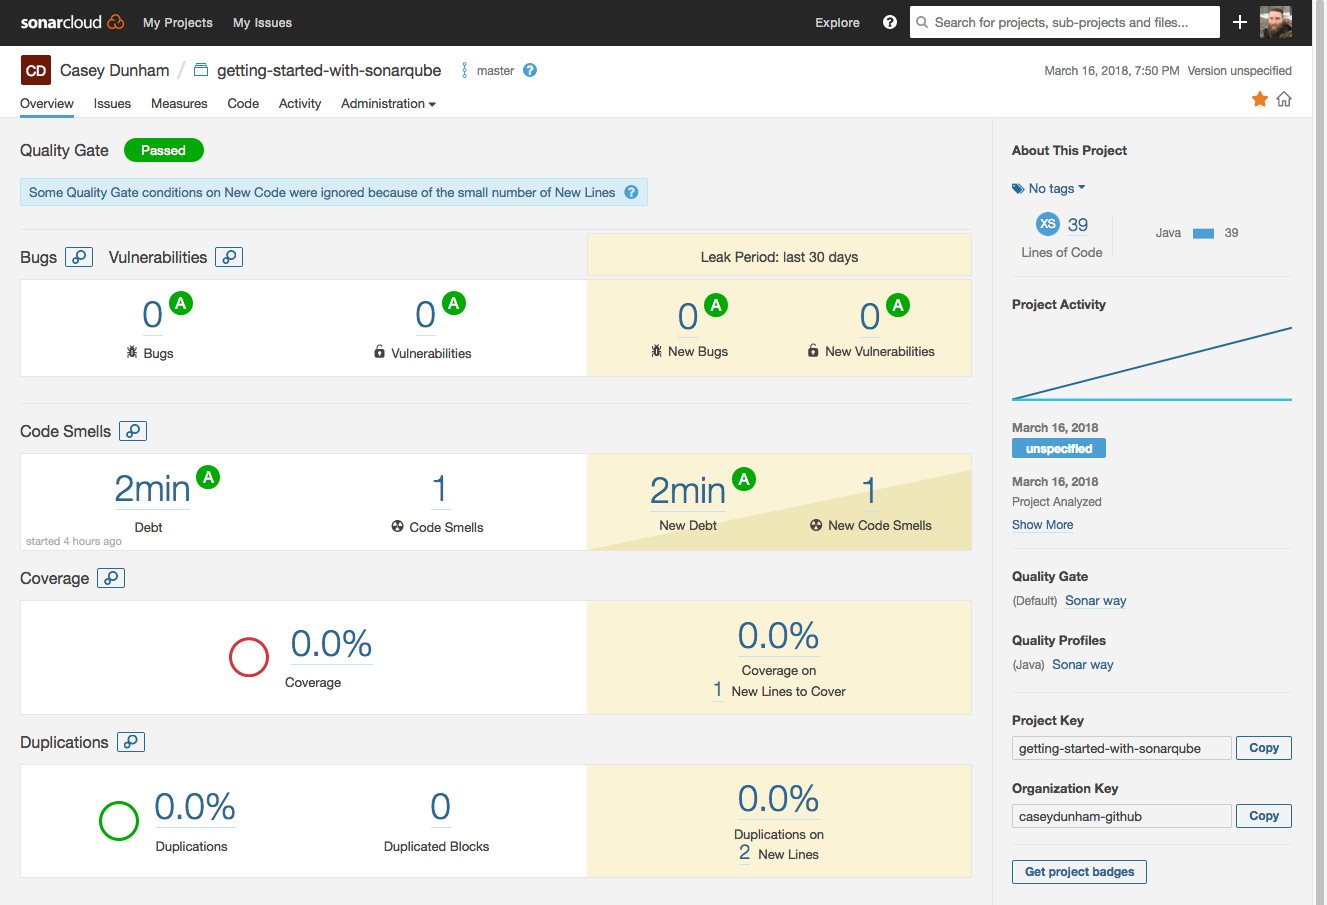
As you can see, this breaks it down a bit further and displays current data as well as data from the last 30 days. Let's dig into the single code smell that we have by clicking the big number one.
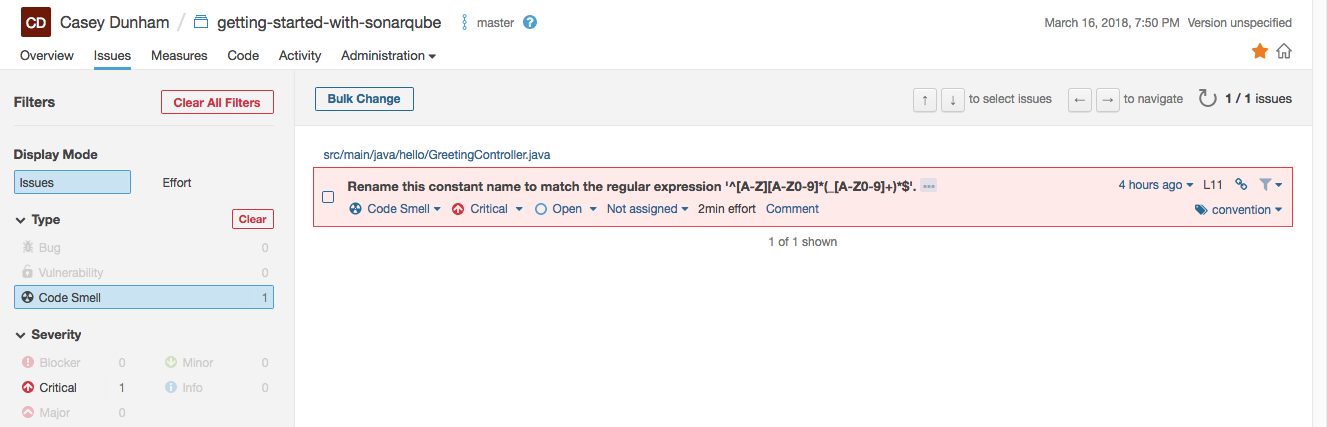
This view shows us the same information that we see in the SonarLint IntelliJ plugin. From this view, we can manage and triage all of the issues in the project, such as categorizing it, assigning it, or handling its resolution status. For now, click on an empty portion of the red finding box to see the code level view.
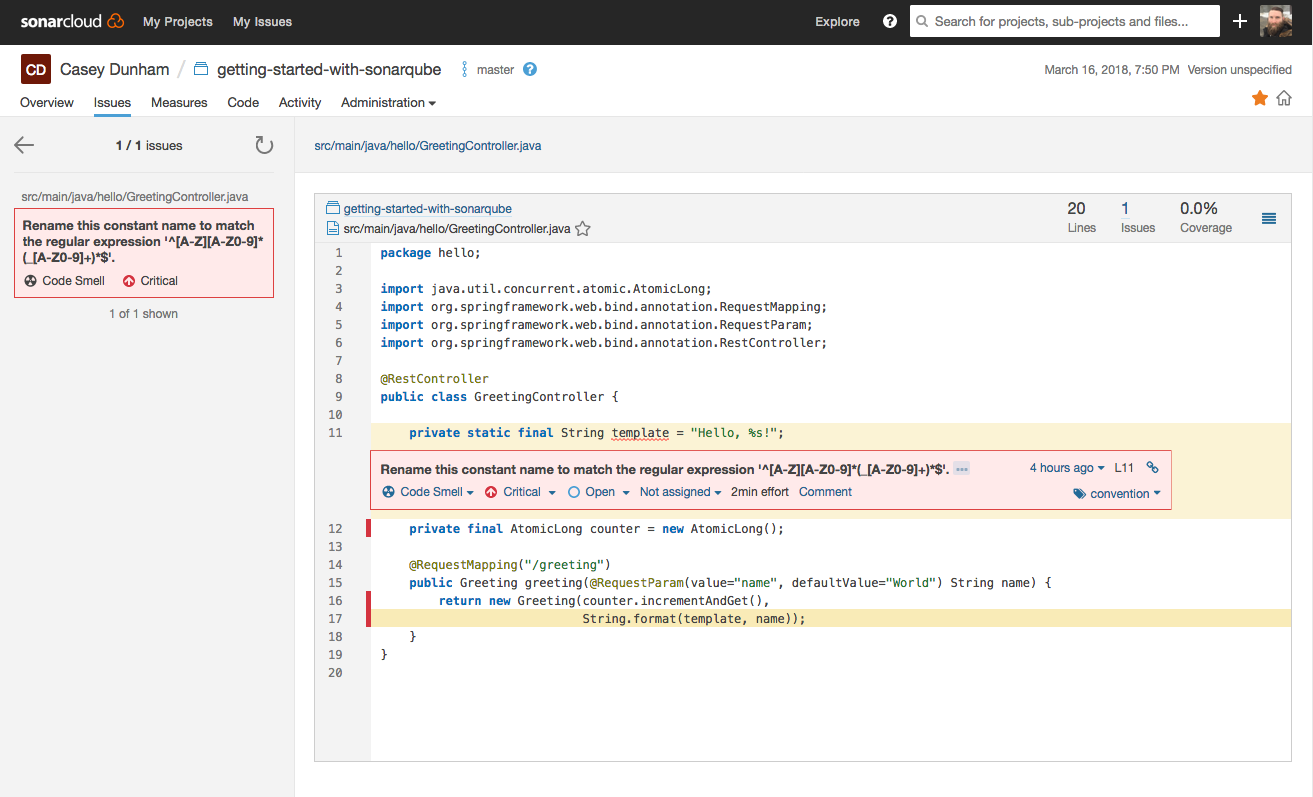
The file level view shows the offending source code that resulted in the finding. This view shows all of the other issues that the analysis reveals related to this file. It also makes it easy to review and triage multiple findings in a single source file.
Go Forth and Maintain Code
We're only scratching the surface of what SonarQube, SonarLint, and SonarCloud have to offer. The next step here is to integrate these tools into your software development lifecycle using your build system. Run the analysis tools before committing source code, and run the analysis during routine builds. In order to write more stable, maintainable, and secure applications, it's crucial that we have a view into what our current issues are. Working toward reducing software complexity has numerous benefits all around, and in the push to become more agile and to iterate and release code quicker, it's imperative that we keep track of where our codebase is from a quality perspective.


