

Overview

When you first start using Jenkins for continuous integration, you will most likely have only a few projects, and the default main screen will suit your needs perfectly.
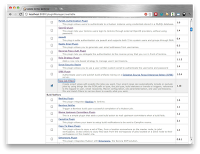
After a while, however, you will have more and more jobs in your Jenkins server and the default screen may no longer be adequate.
Stable Release Version The latest release is 1.18 which was released in September 2011 and has no known issues.
Requirements for Plugin-Use Jenkins 1.398 or newer
Step-by-Step Instructions on How to Use the View Job Filters Plugin:
Installation
- Go to your Jenkins instances root page.
- If your Jenkins instance has security enabled, login as a user who has the Overall | Administer permission.
- Select the Manage Jenkins link on the left-hand side of the screen.
- Select the Manage Plugins link.
- On the Available tab, select the View Job Filters Plugin and click the Download and Install button at the bottom of the page.
- (If you are using a version of Jenkins prior to 1.442) Restart Jenkins once the plugins are downloaded.
Configuration
This plugin does not have any global configuration options, instead it adds additional functionality to the views available within Jenkins.
If you have not created any views, then your system will be using the default “All” view. This view is read only (see the links at the bottom of this page for how to edit your “All” view). So in order to get started with this plugin, you first need to create a view.
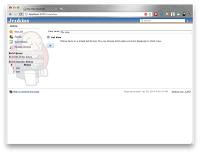
- From your Jenkins instance's root page, there is a tab called “+” at the end of all the tabs. Click on that tab to create a new view.
- Give the view a name, and select the type of view you want to create. View types are an extension point that other plugins can contribute. Jenkins has one built in view type, List View.
If you already have created a view, just select that view and click on the “Edit View” button. In either case you should now be at the following screen:
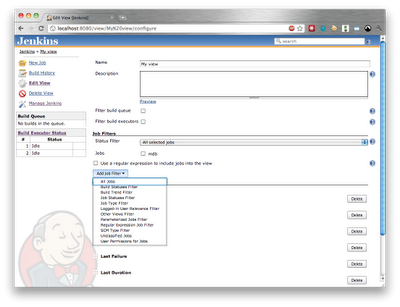
Jenkins has some rudimentary filtering built in, essentially: the status filter; the manual set of check-boxes; and the use a regular expression. So by way of comparison, and so that you know where any issues you might have are originating from, here is the same screen without the View Jobs Filters plugin installed:
To start filtering the jobs in your view, you click on the Add Job Filter button, and select the type of filter to add. There are multiple types of filters, which I will describe in a moment, but first I need to explain how the filters work.
A view starts off with an empty set of jobs. To this is added all the selected jobs, followed by any jobs selected by the regular expression and then this initial set of jobs is filtered based on the built-in status filter. The View Job Filters then proceeds to operate on the set of jobs, adding and removing jobs in sequence. Most of the filters provided by the View Job Filters have a “Match Type” field, which determines whether they add or remove jobs from the set of jobs. The filters apply in the order in which you define them (and you can re-order them by drag and drop). Once all the filters have been applied, you have a final set of jobs that will be displayed in the view.
The Match Types are:
- Include Matched - adds to the set of jobs, any jobs not already in the set which the filter rule matches.
- Include Unmatched - adds to the set of jobs, any jobs not already in the set which the filter rule does not match.
- Exclude Matched - checks all the jobs in the set of jobs, removing any which match the filter rule.
- Exclude Unmatched - checks all the jobs in the set of jobs, removing any which do not match the filter rule.
This is a very powerful mechanism that allows you to create a view containing only the jobs you want to see... though at times it can seem like you are back in school doing set theory while trying to figure out exactly how to cut those Venn Diagrams to get at the set of jobs that you want to see.
The View Job Filters plugin exposes an extension point for other plugins to add additional types of filters, but here are the types of filters that are currently built into the plugin:
- All Jobs: This adds all the jobs to this view. You could select all the checkboxes, you could specify a regex of “.*”, but this is by far the easiest way to start with all the jobs when either the filters you will be adding will be trimming back, or when you want to customize the “All” view.
- Build Statuses Filter: This adds/removes jobs based on their current status, i.e. whether they are currently building; were never built; or are currently in the build queue. By using the Include/Exclude Unmatched match type you can invert the selection, i.e. whether they are currently not building; have been built at least once; or are not in the build queue.
- Build Trend Filter: This adds/removes jobs based on recent events. In some cases the Build Statuses Filter or the Job Statuses Filter will be a simpler way to get the same result. Some of the criteria you can construct with this filter are:
- All jobs that ran in the last 5 hours;
- All jobs that have been unstable for the last 7 builds.
- All jobs that have at least one stable build in the 10 days.
- All jobs that have not been run in the last 30 days.
- All jobs that have been triggered by a SCM change within the last week.
- Job Statuses Filter: This adds/removes jobs based on the job status, i.e. Stable; Failed; Unstable; Aborted; Disabled.
- Job Type Filter: This adds/removes jobs based on the type of job. For example, I use this filter to identify any Maven 2/3 project type jobs so that I canbeat-upgive out to the people creating those jobs thereby continuing my long standing disagreement with Kohsuke over whether the Maven 2/3 project type is a good idea or not ;-)
- Logged-in User Relevance Filter: This adds/removes jobs based on their relevance to the logged in user. For example: matching jobs that were started by the user, or where the user committed changes to the source code of the job; matching jobs with a name that contains the user's name or login id.
- Other Views Filter: This adds/removes jobs based on whether they are in a different view's set of jobs. Note: you can create a circular logic of death if View A has another views filter based on View B which has another views filter based on View A. There are longer and shorter ways to such a circular logic, but it all amounts to a dog chasing its tail.
- Parameterized Jobs Filters: This allows adding/removing parameterized jobs based on whether regular expressions match the job parameters. If you need to use this one, you are doing very fancy stuff altogether. An example use case would be where you have a job parameter that selects the database that the job uses for running tests against, you could create a view which selects all the jobs targeting a specific database.
- Regular Expression Job Filter: This allows using a regular expression to match against one of: the job name; the job description; the SCM configuration (i.e. select a specific branch); the email recipients; the Maven configuration; or the job schedule.
- SCM Type Filter: This allows filtering based on the SCM type, for example to identify all the projects still using CVS or all the projects that have migrated to GIT.
- Unclassified Jobs: This allows finding all the jobs that are not in a view already. Note: you can create a circular logic of death, so if you are using this filter, make sure you put it in one and only one view.
- User Permissions for Jobs: This allows filtering jobs based on the logged in user's permissions for the job, i.e. whether they can: configure; build; or access the job's workspace
Once you have created your chain of filters, you can just save the view to see the set of jobs in that view.
Tips & Tricks
- Start simple - this is a very powerful plugin, and while you can build very complex chains of filters, e.g. a view of All Matrix build jobs which are in the build queue and have at least one non-stable build in the last week, are currently stable, have been started by the current user, are not in view B, have a build parameter with the name matching “[dD]atabase” and a value of “test2” where the SCM is matching “svn:.*/foobar/.*” and which the currently logged in user has not got the ability to configure may make perfect sense to you, but maybe you should start with something a little simpler first, and work your way up to such complexity... you really need to have 100's of jobs before very complex filters become necessary.
- Unclassified Jobs and Other Views Filter should be used with care.**** Both of these filters have the capacity to create circular logic loops. If you use one of them in one and only one view, you have nothing to worry about, but once you think you need to use another one, break out your set theory math book from school to make sure you won't be creating a circular logic loop.
- When you have a system with more than about 25-50 jobs, the default “All” view can become useless, as it can be hard to find the jobs you want. The Jenkins Plugin documentation describes how you can edit or replace the “All” view. Alternatively you can keep the “All” view but just pick a different view as the default view from the main Jenkins configuration screen. It can be useful to have the default view just show jobs that are relevant to the logged in user.
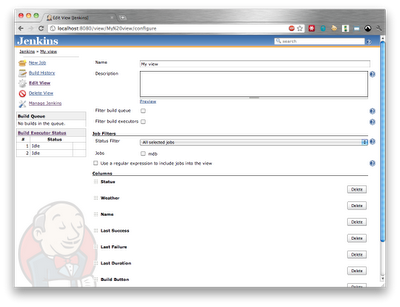
- If you are creating views which are filtered based on job parameters, or based on being relevant to the currently logged in user, you may want to use the Build Filter Wrapper column feature. Some examples might help:
- You create a view which consists of all jobs that the currently logged in user committed to in the past week. You use the Build Filter Wrapper column to replace the default Status, Weather and Last Success/Failure columns so that they only display the results from the builds that the currently logged in user committed to. That way the logged in user can see which builds they broke, as opposed to builds that they committed to recently but that didn't break.
- You create a view which consists of all jobs that have pushed code into the production server (i.e. where the “deployment target” parameter was equal to “production” or some such criteria). You use the Build Filter Wrapper column to replace the default Status, Weather and Last Success/Failure columns so that they only display the results from the actual deployments into production and the subsequent deployments into test are filtered out of the view... that way if the screen is full of blue bells and sunny skies, you are a happy camper!
Known Issues
None.
Relevant Documentation
--Stephen Connolly, Developer
CloudBees cloudbees.com


